Hydraulic failures on fleet vehicles don't give warning — a chafed hose fails at 2,500 psi during a live load drop, a cavitating pump fails at the start of a shift with the body locked in the raised position. These are not accidents; they are the predictable result of deferred PM. A structured hydraulic inspection programme — fluid condition, pressure testing, hose age, PTO engagement, and cylinder drift — catches every developing failure before it becomes a safety incident or a costly breakdown. Oxmaint schedules hydraulic PM by hours, records pressure readings per vehicle, and auto-generates repair work orders for every finding.
Hydraulic Fluid Condition — What Your Sample Tells You
Hydraulic fluid is the most diagnostic sample in any heavy vehicle — its colour, viscosity, water content, and particle count reveal the condition of every component the fluid touches. The analysis matrix below shows how to read a fluid sample and what action it demands before returning a vehicle to service.
Technology Improving Fleet Hydraulic Maintenance
Hydraulic systems on fleet vehicles are typically inspected only when a problem becomes visible — a slow cylinder, a leak, or an abnormal noise. Four technologies shift hydraulic maintenance from visible-symptom reactive to data-driven predictive, catching developing faults before they cause operational failures. Oxmaint connects all four into one hydraulic PM workflow.
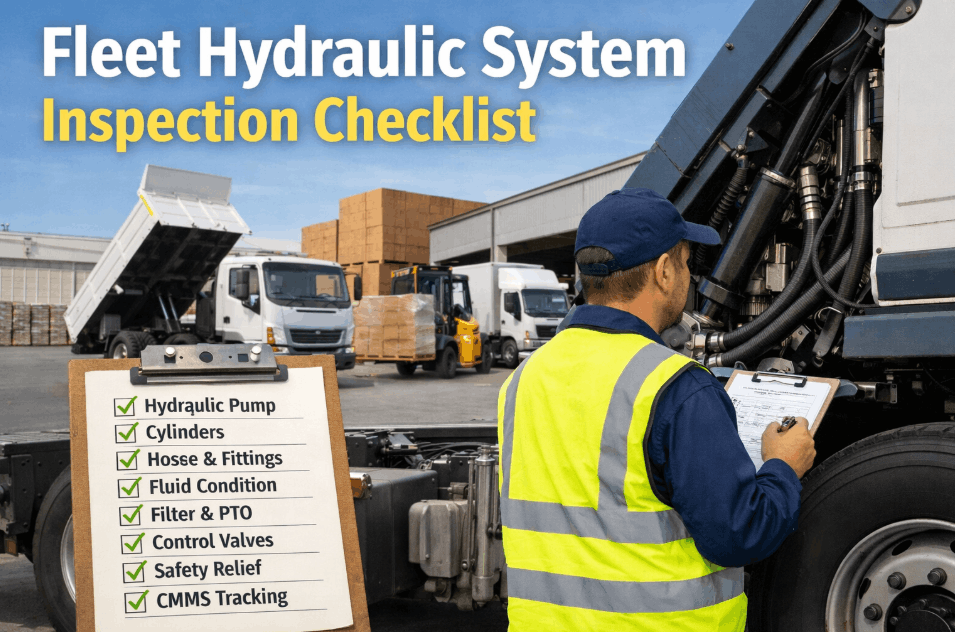
1. Hydraulic Pump, Fluid and Filter Checklist
The pump, fluid, and filter form the hydraulic system's core — all three must be inspected before any other component is checked. Contaminated fluid reaching a pump in poor condition accelerates failure on both. A blocked filter bypasses contamination directly to the pump. Record hydraulic fluid condition and pressure readings in Oxmaint per vehicle.
Hydraulic fluid level — check cold before first cycle of the day
Check fluid level with the body or attachment fully lowered. Low level on a dump truck almost always indicates a leak elsewhere in the system — top up and trace the source before returning to service. Defect — low level
Fluid condition — colour, smell, and water check
Draw a sample and compare against the condition analysis matrix above. Milky or black fluid is an immediate OOS condition — do not operate the system until fluid is flushed and the contamination source identified. OOS — milky or black fluid
Hydraulic filter — differential pressure or service interval check
Replace filter at 500-hour or 6-month interval — whichever comes first. A filter bypassing contamination to the pump is worse than running without one. Check bypass indicator light or gauge if fitted. Defect — at service interval
Pump noise and output — cavitation and whine test at idle and load
Listen for high-pitched whine (cavitation from low fluid or suction restriction) or grinding (internal wear). A pump cavitating at idle is damaging itself with every cycle — find the suction restriction before it destroys the pump. OOS — cavitation noise
System working pressure — gauge test at full load cycle
Test working pressure with a calibrated hydraulic gauge at the test port during a full load cycle. Pressure below the specified working pressure (typically 2,000–2,500 psi) indicates pump wear, relief valve issues, or internal cylinder leakage. Defect — below spec pressure
Safety relief valve — cracking pressure verification
Verify relief valve cracking pressure is set to the system's rated maximum — typically 110–120% of working pressure. A relief valve set too low causes slow, weak operation. Too high risks hose or fitting failure under over-pressure. OOS — outside relief spec
Reservoir breather cap and vent — condition and blockage check
A blocked reservoir breather creates a vacuum on the suction side that causes cavitation — mimicking a failing pump. Inspect and clean the breather cap at every filter service. Replace if cracked or missing its filter element. Defect — blocked breather
Pump mounting bolts and drive coupling — torque and condition
Check all pump mounting bolts for torque and inspect the drive coupling for cracking or rubber element deterioration. A loose pump vibrates, generates heat, and accelerates internal wear — check torque at every filter service interval. Defect — loose mounting
PLC Integration tip: Oxmaint's PLC connector reads pressure sensor data from hydraulic systems in real time — a pressure exceedance above the relief valve setting triggers an immediate alert, capturing the timestamp, cycle count, and operating pressure for root cause investigation before the next shift. See Oxmaint's hydraulic pressure monitoring integration.
2. Hoses, Fittings, Cylinders and Control Valves Checklist
Hoses and fittings are the most failure-prone hydraulic components on fleet vehicles — subject to UV degradation, abrasion, heat cycling, and vibration on every working cycle. A hose failure at 2,500 psi is not a minor leak; it is a high-pressure fluid injection hazard and an immediate fire risk. Every hose must be physically inspected, not just visually scanned from a distance. Track hose age and replacement history per vehicle in Oxmaint's hydraulic PM records.
All hydraulic hoses — physical inspection for abrasion, cracking, and bulging
Run a cloth along each hose while pressurised — a pinhole will cut the cloth. Inspect the full length including hidden sections behind body panels. Any hose showing outer jacket cracking, hard spots, or bulging must be replaced before operation. OOS — bulge or jacket breach
Hose age — replace all hoses at 6 years regardless of condition
Even visually acceptable hydraulic hoses degrade internally and should be replaced at 6 years from the date stamped on the hose. Document hose installation dates in Oxmaint — hydraulic hose age is one of the most commonly untracked fleet PM items. Replace — at 6-year mark
Fittings and ferrules — leak check at full operating pressure
Apply compressed paper towel to all fittings while system is at full working pressure. Any wet patch indicates a fitting leak — do not tighten a leaking fitting under pressure. Depressurise, investigate, and replace before returning to service. OOS — any fitting leak
Cylinders — rod condition, seal leakage, and drift test
Inspect cylinder rods for pitting, scoring, or chrome peeling — damaged rods destroy seals immediately on retraction. Raise the body to full height and measure drift over 5 minutes. More than 10mm drift indicates internal seal bypass requiring cylinder service. Defect — rod damage or drift
Control valve — operation, detent function, and external leakage
Operate each control valve through its full range and verify it returns to neutral. A valve that does not return to neutral keeps a circuit partially energised — causing unintended body movement and potential ejection of the load. OOS — fails to return to neutral
PTO engagement — smooth engagement, no slippage under load
Engage PTO at idle and verify smooth engagement without judder. Apply a load cycle immediately after engagement — PTO slip under load indicates worn clutch packs requiring immediate attention before the unit fails mid-cycle. Defect — slip under load
Body prop safety device — operation and condition check
Verify body prop (physical support bar or safety lock) deploys correctly and locks positively before any person works under a raised body. A body prop that does not lock positively is a fatal crush hazard — the hydraulic system is never a safe substitute for a mechanical prop. OOS — prop not locking
Hydraulic fluid temperature — post-cycle temperature test
Measure fluid temperature immediately after a full work cycle. Fluid above 82°C (180°F) indicates an overloaded circuit, restricted cooling, or contaminated fluid — extended operation above this temperature degrades fluid and seals rapidly. Defect — above 82°C post-cycle
Digital Twin tip: A vehicle's digital twin that accumulates cylinder drift measurements and hose installation dates predicts seal replacement intervals and hose replacement schedules weeks in advance — eliminating the reactive hose failure that strands a loaded vehicle mid-cycle. Book a demo to see predictive hydraulic PM in Oxmaint.
3. PTO, Mounting Structure and Safety Checklist
The PTO, chassis mounting points, and safety devices are the mechanical backbone of any fleet hydraulic system. A body hinge that has cracked, a PTO driveshaft guard missing, or a sub-frame mounting bolt loose enough to allow frame flex creates risks that hydraulic PM alone cannot prevent. These structural and safety items must be inspected every service alongside the hydraulic components. Log PTO and structural inspection results with hydraulic PM findings in Oxmaint.
PTO driveshaft guard — present, secure, and undamaged
Verify the PTO driveshaft guard is in place and undamaged. A missing guard is an OSHA entanglement hazard — any rotating driveshaft without guarding is an immediate stop-work condition that must be resolved before operation. OOS — missing guard
Body hinge pins and bushings — wear and lateral play check
Check body hinge pins for lateral play — more than 5mm indicates worn bushings that allow the body to shift under load during tipping cycles. Shift loading accelerates structural frame fatigue and can cause the body to catch the cab in an uncontrolled drop. Defect — above 5mm play
Sub-frame mounting bolts — torque check at all positions
Check all sub-frame-to-chassis mounting bolts for correct torque. Loose sub-frame bolts allow micro-movement that cracks the chassis frame at mounting points over time — causing structural failures visible only after significant damage has occurred. Defect — loose mounting
Hydraulic tank mounting and drain plug — torque and seal condition
Verify reservoir mounting straps are tight and free from corrosion. Check the drain plug seal for weeping — a drain plug that has been over-tightened strips the thread and creates an unrepairable tank drain that can only be fixed by tank replacement. Defect — strap corrosion or leaking plug
Hydraulic jack pad and stabiliser operation — if fitted
Test all stabiliser jacks through full extension and retraction under load. A jack that fails to retract fully on-road creates a road hazard. A jack that drifts under load indicates seal failure requiring service before the vehicle is used for any stabilised operation. Defect — fails to retract or drifts
Body latch and transport lock — secure in travel position
Verify the body latch or transport lock engages fully in the lowered and road-travel position. A body that is not positively latched for road travel can shift on cornering or braking — creating an unbalanced load and potential structural failure of the hinges. OOS — latch not engaging
Spill kit and leak containment — present in the vehicle cab
Verify a hydraulic fluid spill kit (absorbent granules, disposal bags, and gloves) is carried in the cab. A hydraulic hose failure on a public road without a spill kit creates both an environmental liability and a traffic hazard requiring emergency services response. Required — carry at all times
Our dump truck fleet was averaging two hydraulic hose failures per month — always on route, always with a load. After implementing Oxmaint's hydraulic PM programme with hose age tracking and fluid condition logging, we've had zero in-service hydraulic failures in eight months. The fluid condition matrix alone identified three vehicles with water-contaminated fluid that would have destroyed their pumps within weeks.
Frequently Asked Questions
The most common questions from heavy equipment technicians and fleet managers about hydraulic PM intervals, fluid specifications, and safety requirements.
Every 500 hours or 6 months — whichever comes first for heavy-duty fleet operations. Vehicles working in dusty, high-temperature, or water-exposure environments should change fluid every 250 hours. Always send a sample for analysis before the scheduled interval if milky or dark fluid is observed.
Milky fluid indicates water contamination — from a cooler seal failure, condensation, or water ingress through a breather. It is not safe to operate — water causes severe cavitation, seal degradation, and corrosion of internal pump and valve components. Flush and find the source before restarting.
At 6 years from the manufacture date stamped on the hose — internal degradation is invisible externally. High-pressure hoses on vehicles operating above 2,000 psi or in extreme temperature environments should be replaced at 4 years. Document hose installation dates in CMMS at every replacement.
Raise the body or attachment to full extension under load, hold at working pressure, and measure position change over 5 minutes. Less than 10mm is acceptable. Above 10mm indicates internal seal bypass requiring cylinder service before continued operation creates an uncontrolled-descent hazard.
High-pressure hydraulic fluid injected through the skin from a pinhole leak appears as a minor puncture but causes severe internal tissue destruction and requires emergency surgery. Never test for leaks with a bare hand — use a folded piece of cardboard or paper. Any suspected injection injury is a medical emergency.
Oxmaint schedules hydraulic PM by hours or calendar, records fluid condition ratings, pressure test results, and hose installation dates per vehicle — triggering automatic replacement reminders at 500-hour fluid service and 6-year hose intervals, with full PLC pressure data integration for real-time monitoring.


