How to Create a Work Order: Step-by-Step CMMS Guide [2026]

Connect with Industry Experts, Share Solutions, and Grow Together!

Join Discussion Forum
how-to-create-work-order-step-by-step-cmms

Creating a work order should take under 60 seconds — from the moment a maintenance need is identified to a fully classified, assigned, and tracked task in your CMMS. Yet most maintenance teams spend 15–30 minutes processing each request through phone calls, emails, spreadsheets, and verbal handoffs that lose information at every step. The difference is not effort — it is architecture. A properly configured CMMS converts a plain-language maintenance request into a complete, prioritized, assigned, and trackable work order in seconds, with the asset history, parts list, and compliance tags attached automatically. This guide walks through every step of creating a work order in a modern CMMS — from the initial request through assignment, execution, close-out, and analytics — with the exact field structure, workflow logic, and configuration decisions that determine whether your work orders generate maintenance intelligence or just digital paperwork. Start your free OxMaint trial and create your first digital work order in under 2 minutes.

Why Most Work Orders Fail Before They Start
Vague Descriptions
"Room 204 is hot" — no asset ID, no symptoms, no priority. Technician arrives blind, makes a diagnostic trip, returns for parts.
No Asset Linkage
Work order references a room — not an asset. Zero maintenance history. No parts list. No failure pattern data. Every repair starts from scratch.
Manual Dispatch
Supervisor reviews requests, makes phone calls, assigns by memory. 45-minute dispatch meeting every morning. Emergencies re-shuffle everything manually.
CMMS Solution
Structured fields, asset linking, AI classification, auto-routing, mobile execution, and digital close-out — every step automated.

Step 1 — Identify the Maintenance Need and Submit the Request

Every work order begins with someone identifying that maintenance is needed. In a CMMS, this request can come from five sources — and the system should accept all of them without requiring the requestor to understand maintenance terminology or asset classifications:

Channel 1: Mobile App
Staff & Occupant Submissions
Building occupants, teachers, students, or staff open the CMMS mobile app, select the building and room, describe the issue in plain language, attach a photo, and submit. No maintenance knowledge required.
What the Requestor Sees
Building picker (dropdown) Room/area selector Problem description (free text) Photo upload (camera) Urgency selection (optional)
Best for: Occupant-reported issues. Fastest adoption. Most organizations see 90%+ request quality improvement vs. phone calls.
Channel 2: Web Portal
Department Coordinators
Facility coordinators or department managers submit requests through the web interface with more detail — including asset identification, priority assessment, and preferred scheduling windows.
What the Coordinator Sees
Asset search/selection Priority recommendation Preferred schedule window Budget code (if required) Attachment upload
Best for: Recurring issues, planned requests, and department-level maintenance coordination with budget tracking.
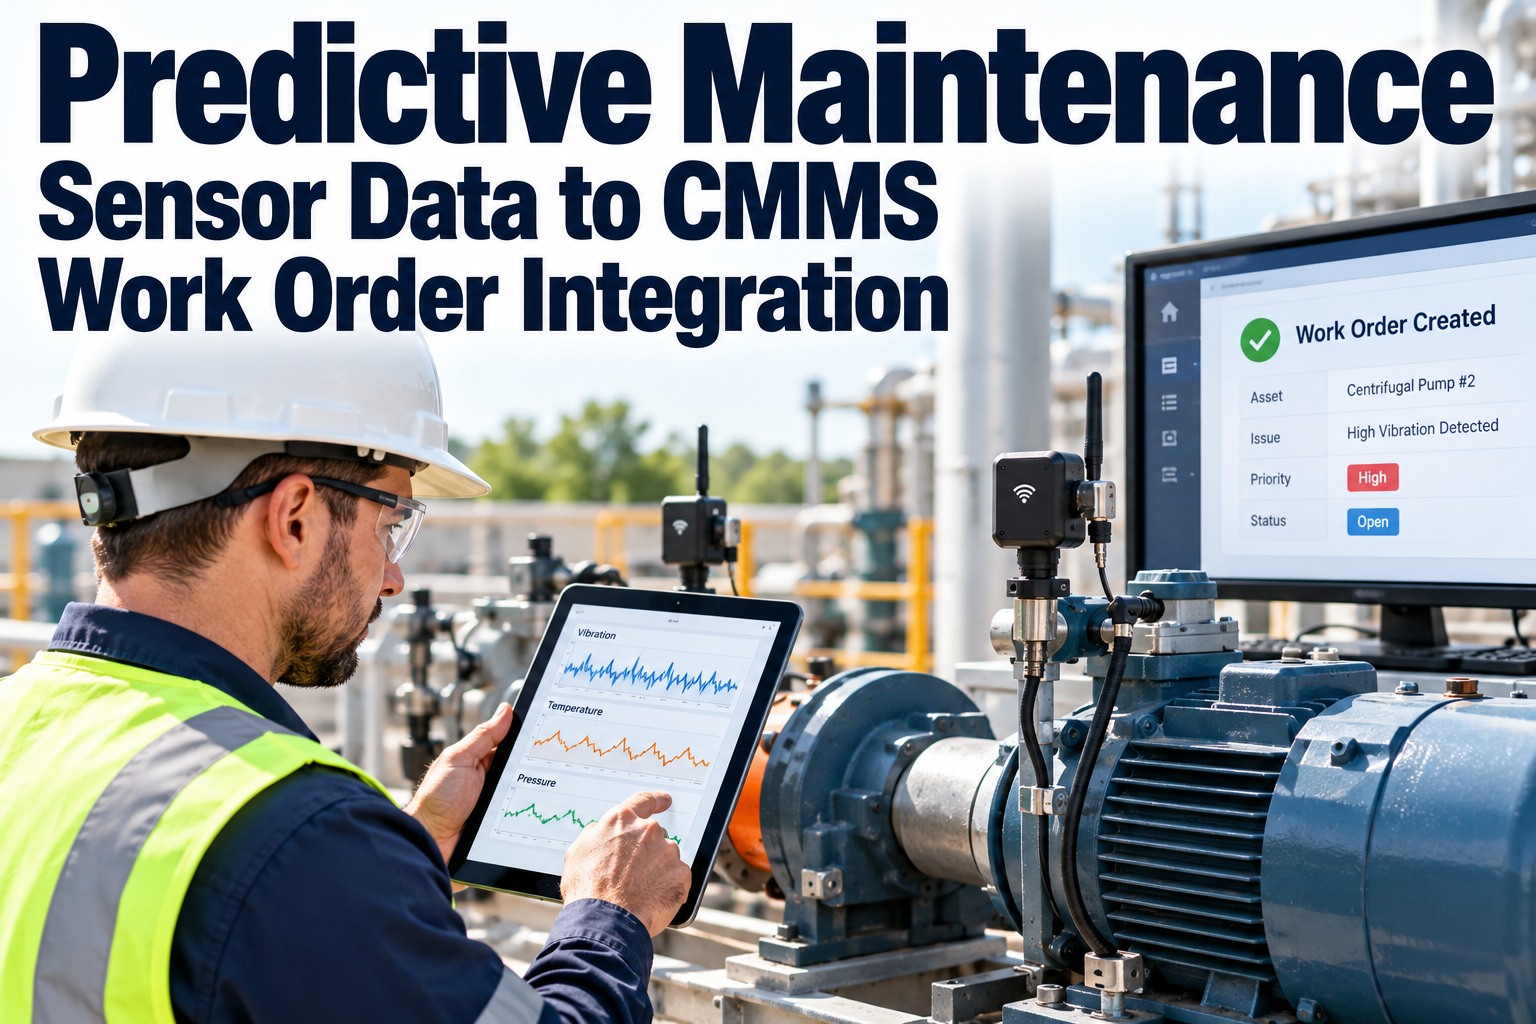
Channel 3: IoT / BAS Auto-Generation
Sensor-Triggered Requests
Building automation systems and IoT sensors detect conditions outside defined thresholds — temperature exceeding setpoint, vibration above baseline, filter differential pressure exceeded — and automatically generate work requests with the specific asset, condition, and reading attached.
Auto-Generated Data
Asset ID (from sensor) Condition trigger value Threshold that was exceeded Timestamp of detection Recommended action
Best for: Equipment-level monitoring. Catches issues before occupants notice. Enables predictive and condition-based work orders.

Two additional channels — email parsing (the CMMS extracts request details from incoming emails) and PM auto-scheduling (the CMMS generates recurring work orders based on time, runtime, or condition triggers) — complete the five input sources. The key principle is that no maintenance need should require a phone call, a walk-in visit, or a paper form. Every channel feeds the same triage queue. Book a demo to see all five request channels configured in OxMaint for your facility type.

Step 2 — Triage, Classify, and Prioritize

Once the request enters the system, it must be classified before it becomes a work order. This step determines the work type, priority level, required trade, and whether it needs approval. In a well-configured CMMS, AI handles most of this automatically — but understanding the logic ensures your configuration is correct.

Classification Decision
Options
How to Decide
AI Automation
Work Order Type
Corrective, Preventive, Emergency, Predictive, Planned/Project
Is this reactive (something broke), scheduled (PM due), urgent (safety hazard), or predicted (sensor trend)?
AI classifies from description + source
Priority Level
Emergency, High, Medium, Low
Does this involve safety? Student impact? Regulatory compliance? Production stoppage? Or routine?
AI scores by safety + impact + asset criticality
Trade Required
HVAC, Electrical, Plumbing, General, Controls, Elevator
What type of technician is needed? Based on asset type and problem description keywords.
AI matches asset type → trade
Approval Required?
Auto-approve, Supervisor, Director, Budget authority
Standard corrective and PM: auto-approve. Above cost threshold or capital: route for approval.
Rules-based routing by cost + type
Duplicate Check
New request, Duplicate, Related to existing
Is someone already working on this? Has the same issue been reported for this asset in the last 48 hours?
AI detects duplicates and merges
AI Classification in Practice: When a requestor submits "Room 204 is really hot — students are complaining," OxMaint's NLP engine identifies the asset (AHU serving Building 5 Room 204), classifies the type (corrective), assigns priority (high — classroom in session), identifies the trade (HVAC), checks for duplicates (none in last 48 hours), and auto-approves (standard corrective, below cost threshold). The request becomes a fully classified work order in under 3 seconds — no human triage required.

Step 3 — Build the Complete Work Order

The classified request now becomes a work order with all seven essential elements populated. In a CMMS, most of these fields auto-populate from the asset registry, previous maintenance history, and classification rules — the technician or planner only needs to verify and supplement, not build from scratch.

01
Task Description (Auto-Enriched)

The original request text is preserved, but the CMMS enriches it with asset context: "AHU-3 serving Bldg 5 Rm 204 — occupant reports room too hot. Supply air temp: 82°F vs. 72°F setpoint (BAS live reading). Last PM: 47 days ago (on schedule). Last corrective WO: VAV actuator replacement 8 months ago. Possible cause: VAV box actuator, supply fan belt, or controls fault." The technician arrives with diagnostic context, not just a complaint.

Auto-populated from: Request text + BAS live data + asset maintenance history
02
Asset Identification (Auto-Linked)

The CMMS resolves the location (Building 5, Room 204) to the specific serving asset (AHU-3) using the asset-location mapping in the registry. The work order is linked to AHU-3's complete record: installation date, manufacturer, model, nameplate data, warranty status, and the full repair history. Every future search for AHU-3 will surface this work order.

Auto-populated from: Asset registry + location mapping. Technician sees: asset tag, age, last 5 repairs, common failure modes.
03
Priority & Classification (AI-Assigned)

Priority: High (classroom actively in session, 30+ occupants, comfort complaint). Type: Corrective. Trade: HVAC. Compliance tags: ASHRAE 62.1 (ventilation), OSHA indoor temperature (if applicable). Safety flags: none. Student-impact score: 8/10 (classroom during academic hours). All of these fields are set by the AI classification engine from Step 2.

Auto-populated from: AI classification rules + space type database + academic calendar integration
04
Assignment & Scheduling (AI-Routed)

The CMMS assigns the work order to the HVAC technician who is: (a) certified for the equipment type, (b) currently closest to Building 5 based on GPS, (c) has the lightest current workload, and (d) is not already committed to a higher-priority task. The technician receives a push notification on their mobile device with the full work order, directions to the building, and the asset's repair history. No dispatch meeting. No phone call. No clipboard.

Auto-populated from: Technician profiles (skills, certs, location) + workload balancing algorithm + geographic clustering
05
Parts & Materials (Pre-Staged)

Based on the suspected failure mode and the asset's repair history, the CMMS suggests likely parts: VAV actuator (Part #BEL-LF24, 3 in stock), fan belt (Part #AX-48, 12 in stock), or controls relay (Part #RIB-24, 6 in stock). The technician can reserve parts from the storeroom before heading to the job — eliminating the return trip that wastes 45–90 minutes on 30% of corrective work orders.

Auto-populated from: Failure mode analysis + asset-parts linking + real-time inventory levels

Fields 6 (completion documentation) and 7 (digital audit trail) are populated during and after execution — covered in Steps 5 and 6 below. At this point, the work order is complete enough to dispatch: the technician knows what to do, where to go, what the asset's history is, what parts to bring, and how urgent it is. Sign up free on OxMaint and see how auto-population reduces work order creation from 15 minutes to under 60 seconds.

Every Field. Auto-Populated. Under 60 Seconds.

OxMaint builds complete work orders from plain-language requests — no manual data entry required.

Asset linking, AI classification, technician routing, and parts pre-staging happen automatically.

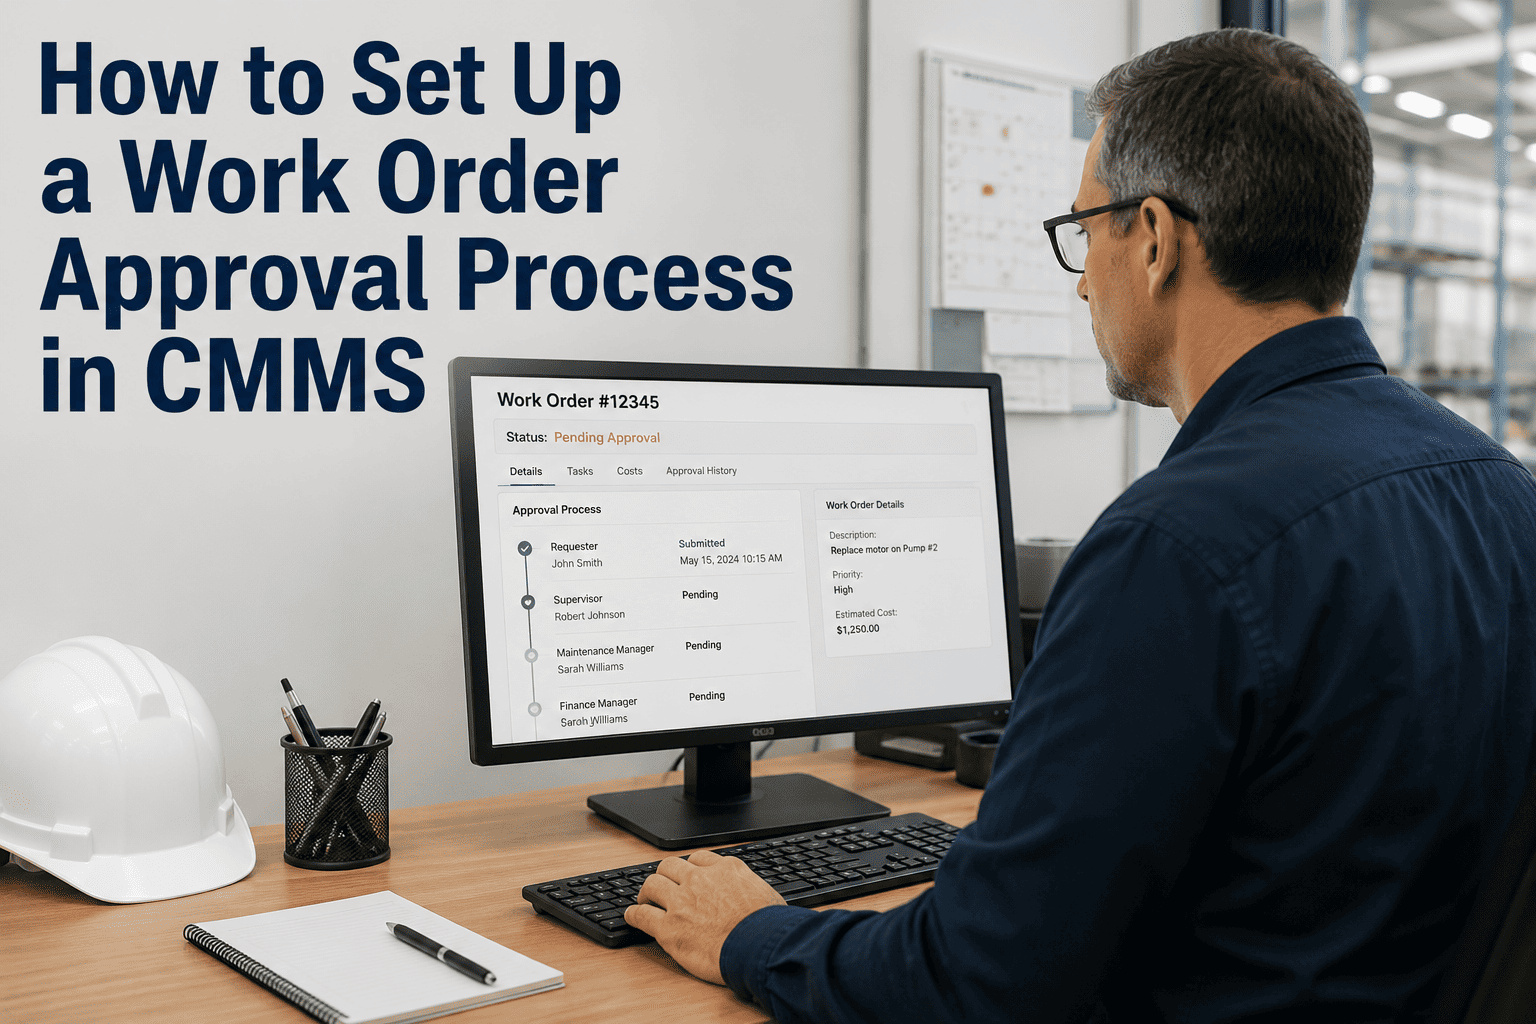
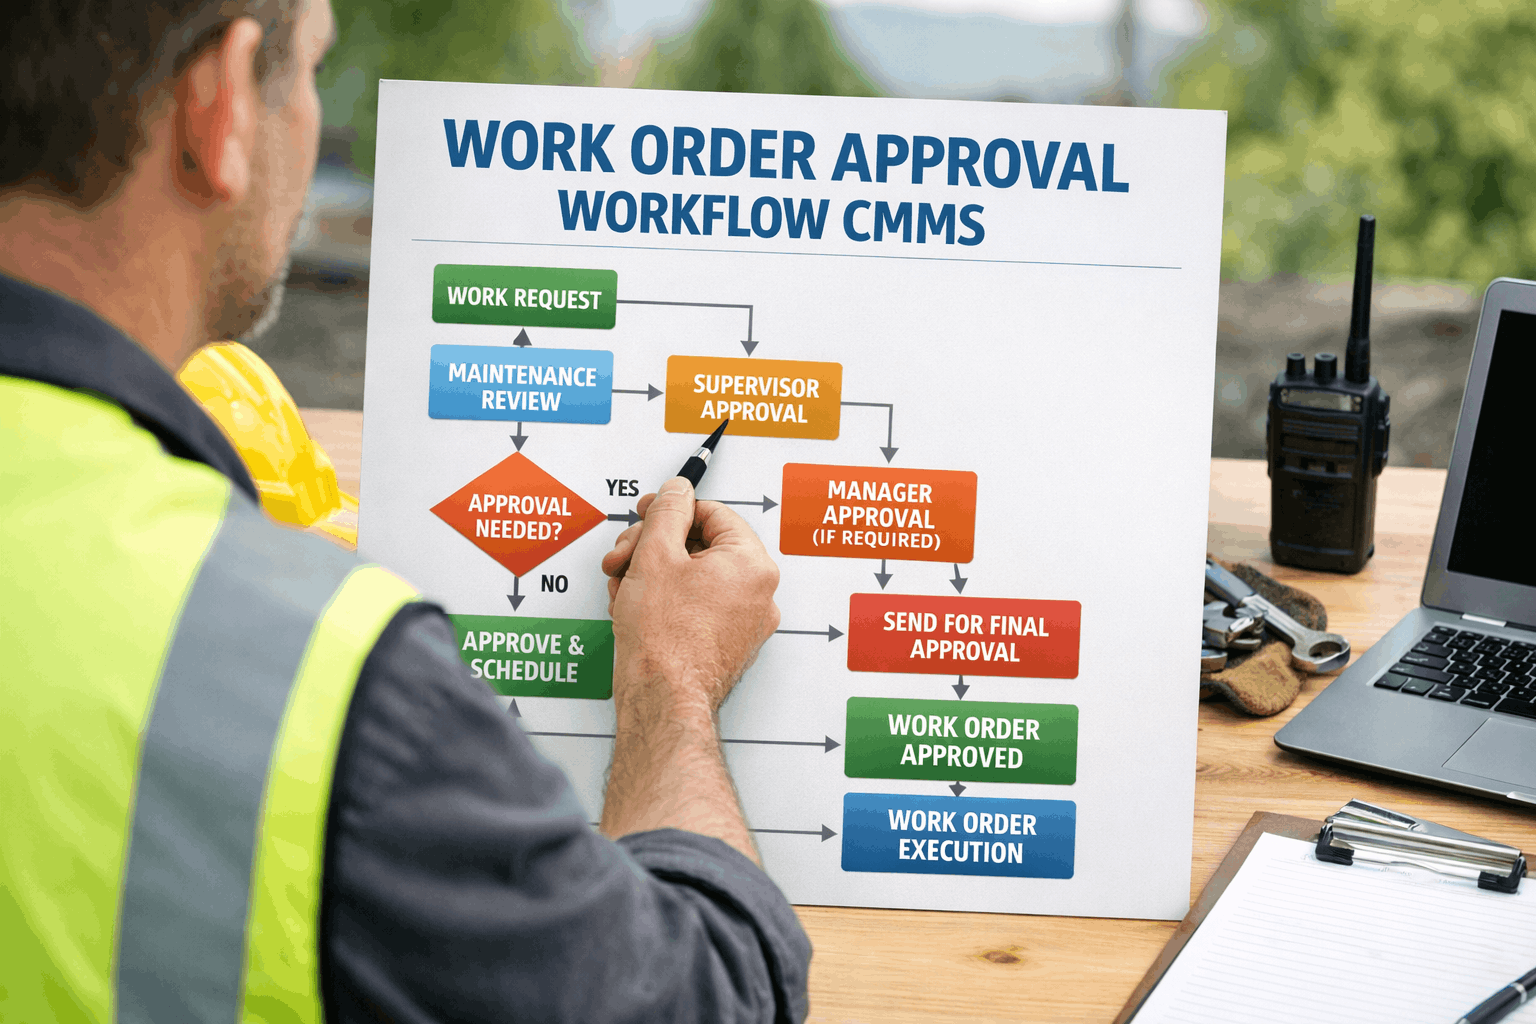
Step 4 — Approve (When Required)

Not every work order needs approval. Standard corrective work orders and scheduled PMs should auto-approve to avoid creating bottlenecks that delay response. Approval workflows should only trigger for specific conditions — and when they do, the CMMS should route them instantly rather than waiting for someone to check a queue.

Approval Scenario
When to Require Approval
CMMS Automation
Standard corrective (under cost threshold)
No approval needed. Auto-approve and dispatch immediately. Any delay costs more than the work order itself.
Auto-approved on creation. Technician notified instantly. Supervisor sees the WO in their dashboard for awareness, not approval.
Preventive maintenance (scheduled PM)
No approval needed. These were approved when the PM programme was configured. Requiring re-approval defeats the purpose.
Auto-generated and auto-approved on schedule trigger. Technician receives the task with checklist and parts list ready.
Above cost threshold (e.g., >$5,000)
Route to facilities director for approval. Include estimated cost, asset history, and urgency justification.
Auto-routed to approver with push notification. Approver sees cost estimate, asset history, and one-tap approve/reject on mobile.
Capital project or contractor engagement
Route to CBO or budget authority. Include scope, vendor quotes, and budget code. May require board-level approval above threshold.
Multi-level approval chain configured per dollar amount. Each approver receives the package with all supporting documentation attached.
Safety or compliance-related
Auto-approve AND escalate. Safety work should never wait for approval. Notify safety officer and facilities director simultaneously.
Auto-approved with simultaneous escalation notifications. Compliance-tagged for regulatory documentation. Response clock starts immediately.

Step 5 — Execute the Work Order in the Field

This is where the work actually happens — and where most paper-based systems lose all their data. A CMMS with a mobile-first field execution workflow captures everything the technician does, sees, and uses in real time, building the documentation that turns a completed task into permanent maintenance intelligence.

1
Check-In on Arrival
Technician opens the work order on their mobile device and taps "Check In" when they arrive at the asset location. The system logs arrival time, calculates travel time from the previous job, and starts the labor clock. GPS confirmation is optional but recommended for large campus or multi-site operations.
Timestamp: arrival logged

2
Review Asset History & AI Recommendations
Before starting work, the technician reviews the asset's maintenance history surfaced by the CMMS: last 5 repairs, most common failure modes, parts previously used, and any AI-generated repair recommendations based on the reported symptoms. For new technicians, this replaces the institutional knowledge that would otherwise take months to acquire.
Context: 30-second review

3
Capture Before Photo
The technician photographs the current condition of the asset or deficiency using the in-app camera. This creates the baseline documentation for before/after comparison, insurance records, and compliance evidence. For PM work orders, the checklist may include specific photo requirements (e.g., "photograph filter condition before replacement").
Documentation: visual baseline

4
Perform the Work & Log Actions
The technician performs the repair, PM task, or inspection. For PM work orders, they follow the standardized checklist — tapping pass/fail for each item and entering readings where required. For corrective work, they document what they found (root cause), what they did (repair actions), and what they used (parts consumed). Voice-to-text entry speeds field documentation.
Execution: real-time logging

5
Record Parts & Capture After Photo
Parts consumed are logged against the work order — scanned from inventory via barcode/QR or selected from the asset's parts list. The storeroom inventory is auto-deducted in real time. An after photo documents the completed repair. Total labor time is calculated from check-in to this point.
Close-out: parts + photo + time

Step 6 — Close Out the Work Order

Closing a work order is not just tapping "complete" — it is the step that converts a finished task into permanent data. A properly closed work order feeds asset history, cost tracking, compliance records, and performance analytics. Skipping close-out documentation is the single most common mistake maintenance teams make — and the most expensive in terms of lost intelligence.

Required Close-Out Fields
Actual work performedWhat was done (may differ from what was planned)
Root cause identifiedWhy it failed — worn bearing, clogged filter, controls fault
Parts consumedPart numbers, quantities, cost — auto-deducted from inventory
Actual labor hoursCheck-in to check-out time, per technician if multi-tech
Before/after photosVisual documentation of condition and completed repair
Follow-up required?If yes, linked follow-up WO auto-created with context
Failure codeStandardized code for failure type — feeds pattern analysis
What Close-Out Data Enables
Asset history: Every closed WO builds the asset's permanent maintenance record — searchable by any technician, any time.

Cost tracking: Labor + parts + contractor cost per WO, per asset, per building — feeding TCO analysis and capital planning.

Compliance: Timestamped completion with technician ID and photos satisfies OSHA, NFPA, ADA, and ASHRAE audit requirements.

Pattern analysis: Failure codes across thousands of closed WOs reveal which assets are failing most, why, and how much it costs — driving predictive investment.

Step 7 — Review, Analyse, and Improve

Closed work orders are not endpoints — they are data inputs. Every work order generates metrics that, when aggregated across the portfolio, reveal the operational patterns that drive improvement. This is where the CMMS transforms from a task management tool into a maintenance intelligence platform.

KPI
What It Measures
Target & Action
Average response time
Time from WO creation to technician on-site. Measures dispatch efficiency and routing effectiveness.
Target: <24h standard, <1h emergency. If above target: review routing rules, technician availability, and geographic clustering.
PM compliance rate
% of scheduled PMs completed on or before due date. Measures programme discipline and resource allocation.
Target: 95%+. Below 80%: PM deferral is creating future emergencies. Review staffing, scheduling conflicts, and parts availability.
Planned vs. unplanned ratio
% of WOs that are planned (PM + predictive + project) vs. unplanned (corrective + emergency). Single most important maturity indicator.
Target: 80/20 planned/unplanned. Most paper-based operations are 40/60 or worse. Every 10-point improvement saves 15–20% on maintenance cost.
Cost per work order
Total cost (labor + parts + contractor) ÷ WO count — by type and asset class. Emergency WOs cost 3–5× planned.
Track trend over time. Decreasing average cost indicates shift toward planned work. Increasing cost on specific assets signals replacement candidacy.
First-time fix rate
% of WOs resolved on the first visit without a return trip. Measures work order quality, parts pre-staging, and diagnostic accuracy.
Target: 85%+. Below 70%: improve WO descriptions, pre-stage parts based on failure mode, and provide technicians with asset history.
From Request to Intelligence in 7 Steps

Every Step Above Is Built Into OxMaint

Multi-channel request intake, AI classification, auto-routing, mobile field execution, digital close-out, and real-time KPI dashboards — all in one platform that deploys in weeks and generates intelligence from day one.

<60sWork order creation time with auto-population
85%+First-time fix rate with parts pre-staging
100%Audit-ready compliance documentation

Work Order Configuration Checklist: Setting Up Your CMMS Right

Before creating your first work order, these configuration decisions determine how much value your CMMS generates. Get these right during setup and every work order created thereafter will be higher quality, faster to process, and more analytically valuable:

Configuration 1: Asset Registry
Build Your Asset Hierarchy First
Every work order links to an asset. If your asset registry is incomplete, your work orders will be incomplete. Import every maintainable asset with: unique ID, location (building/floor/room), type, manufacturer, model, installation date, and criticality rating.
Timeline: 1–2 weeks for most facilities. OxMaint supports bulk CSV import and provides onboarding assistance.
Configuration 2: Work Order Types & Priorities
Define Your Classification Framework
Configure your 5 work order types (corrective, PM, emergency, predictive, planned) and 4 priority levels (emergency, high, medium, low) with clear definitions. Map each combination to a response time SLA so the system enforces your standards.
Timeline: 1 day. Define once, apply to every work order automatically. OxMaint includes default frameworks customisable to your operation.
Configuration 3: Technician Profiles
Set Up Skills, Certs & Zones
Create profiles for every technician with: trade speciality, certifications held, building zone assignments, and shift schedule. This is what enables AI routing to assign the right technician automatically.
Timeline: 1 day. Update as certifications change. OxMaint tracks cert expiration dates and alerts before lapse.

Common Mistakes When Creating Work Orders (And How to Fix Them)

Mistake
What Goes Wrong
The Fix
CMMS Prevention
Vague descriptions
"Fix AC in 204" — tech arrives blind, wastes 45+ min on diagnostics, returns for parts
Require structured fields: symptoms, asset ID, urgency. AI enriches with BAS data and history.
Mandatory fields + AI enrichment
No asset linkage
WO references room, not asset. No history. No parts list. No pattern data. Zero analytical value.
Require asset selection on every WO. QR/barcode scanning makes it instant in the field.
Mandatory asset field + QR scan
Everything is "high priority"
When everything is urgent, nothing is prioritised. Techs work on whoever complained loudest.
Enforce structured priority framework. AI assigns priority by safety, compliance, impact, and criticality.
AI priority scoring removes subjectivity
Skipping close-out docs
WO closed as "done" with no actual work, parts, or root cause. Asset history is useless. No cost data.
Require completion fields before system allows close-out. Mobile-first entry makes it 2 minutes, not 20.
Mandatory close-out fields + mobile UX
No follow-up tracking
Tech finds additional issue during repair but doesn't document it. Issue festers until it becomes an emergency.
Enable linked follow-up WO creation from within the active WO. One tap creates a new WO with parent context.
Linked WO creation from field app
From Request to Intelligence in 7 Steps

Ready to create work orders that generate intelligence?

OxMaint transforms every work order from a task into a data point. Start free. Deploy in days.

Frequently Asked Questions

01

How long does it take to create a work order in OxMaint?

Under 60 seconds for a complete, fully classified work order. The requestor describes the issue in plain language (mobile app, web portal, or email), and the AI engine auto-classifies the work type, assigns priority, identifies the asset, suggests parts, and routes to the optimal technician. For IoT-generated work orders, creation is fully automatic — zero human input required. PM work orders are auto-generated on schedule without any manual creation step.

02

Can non-maintenance staff submit work requests without training?

Yes — this is a core design principle. The requestor interface shows only what non-technical users need: building/room selection (dropdown), problem description (free text), photo upload (camera), and urgency indicator (optional). The requestor never sees asset IDs, priority codes, trade classifications, or technical fields. The CMMS handles all classification and routing behind the scenes. Most organisations achieve full adoption within one week of launch with zero formal training — the interface is as simple as sending a text message. Sign up free and test the requestor interface yourself in under 5 minutes.

03

What if our technicians are not comfortable with mobile apps?

OxMaint's technician interface is designed for field workers, not office workers. The workflow is: open the app, see your assigned work orders sorted by priority, tap a job, tap "Check In" on arrival, follow the checklist or log actions, scan parts, take photos, tap "Complete." Most technicians are fully productive within one shift of introduction. The app works offline in areas with poor connectivity and syncs when connection is restored. Voice-to-text entry eliminates typing on small screens. The teams that resist mobile adoption most strongly are typically the same teams spending 45+ minutes per day on paper processing they can eliminate.

04

How do we handle emergency work orders differently from standard ones?

Emergency work orders bypass the normal queue entirely. When classified as emergency (safety hazard, regulatory violation, or critical system failure), the WO is auto-approved, auto-escalated to the facilities director and safety officer, and routed to the nearest qualified technician with an audible push notification that overrides do-not-disturb settings. The response clock starts immediately. Every action during the emergency is timestamped for the incident record. After resolution, the system prompts for root cause analysis and generates any follow-up corrective work orders needed to prevent recurrence. Book a demo to see emergency workflow configuration and escalation rules.

05

How do we transition from paper work orders to OxMaint?

The transition follows a proven 4-week phased approach. Week 1: import your asset registry (buildings, equipment, locations) via CSV and configure work order types, priorities, and technician profiles. Week 2: migrate your open work order backlog and set up PM schedules for critical assets. Week 3: train technicians on the mobile app (typically 1–2 hours of guided use) and go live for all new requests. Week 4: complete legacy paper WOs in the old system while all new work flows through OxMaint. By day 30, you are fully digital with zero parallel systems. The OxMaint onboarding team provides hands-on support throughout the transition at no additional cost.

06

Can OxMaint generate work orders automatically from building sensors?

Yes. OxMaint integrates with major BAS platforms (Siemens, JCI, Honeywell, Tridium, Schneider Electric) via BACnet/IP, Modbus, and API. When a sensor detects a condition outside defined parameters — temperature, pressure, vibration, humidity, filter differential pressure — the system auto-generates a work order with the specific asset, condition value, threshold exceeded, and recommended corrective action. AI-powered platforms go further: they correlate multiple sensor readings to detect developing failures 2–6 weeks before any individual sensor triggers an alarm, creating predictive work orders that prevent emergencies rather than responding to them.
By Jennie

Experience
Oxmaint's
Power

Take a personalized tour with our product expert to see how OXmaint can help you streamline your maintenance operations and minimize downtime.

Book a Tour

Share This Story, Choose Your Platform!

Connect all your field staff and maintenance teams in real time.

Report, track and coordinate repairs. Awesome for asset, equipment & asset repair management.

Schedule a demo or start your free trial right away.

iphone

Get Oxmaint App
Most Affordable Maintenance Management Software

Download Our App