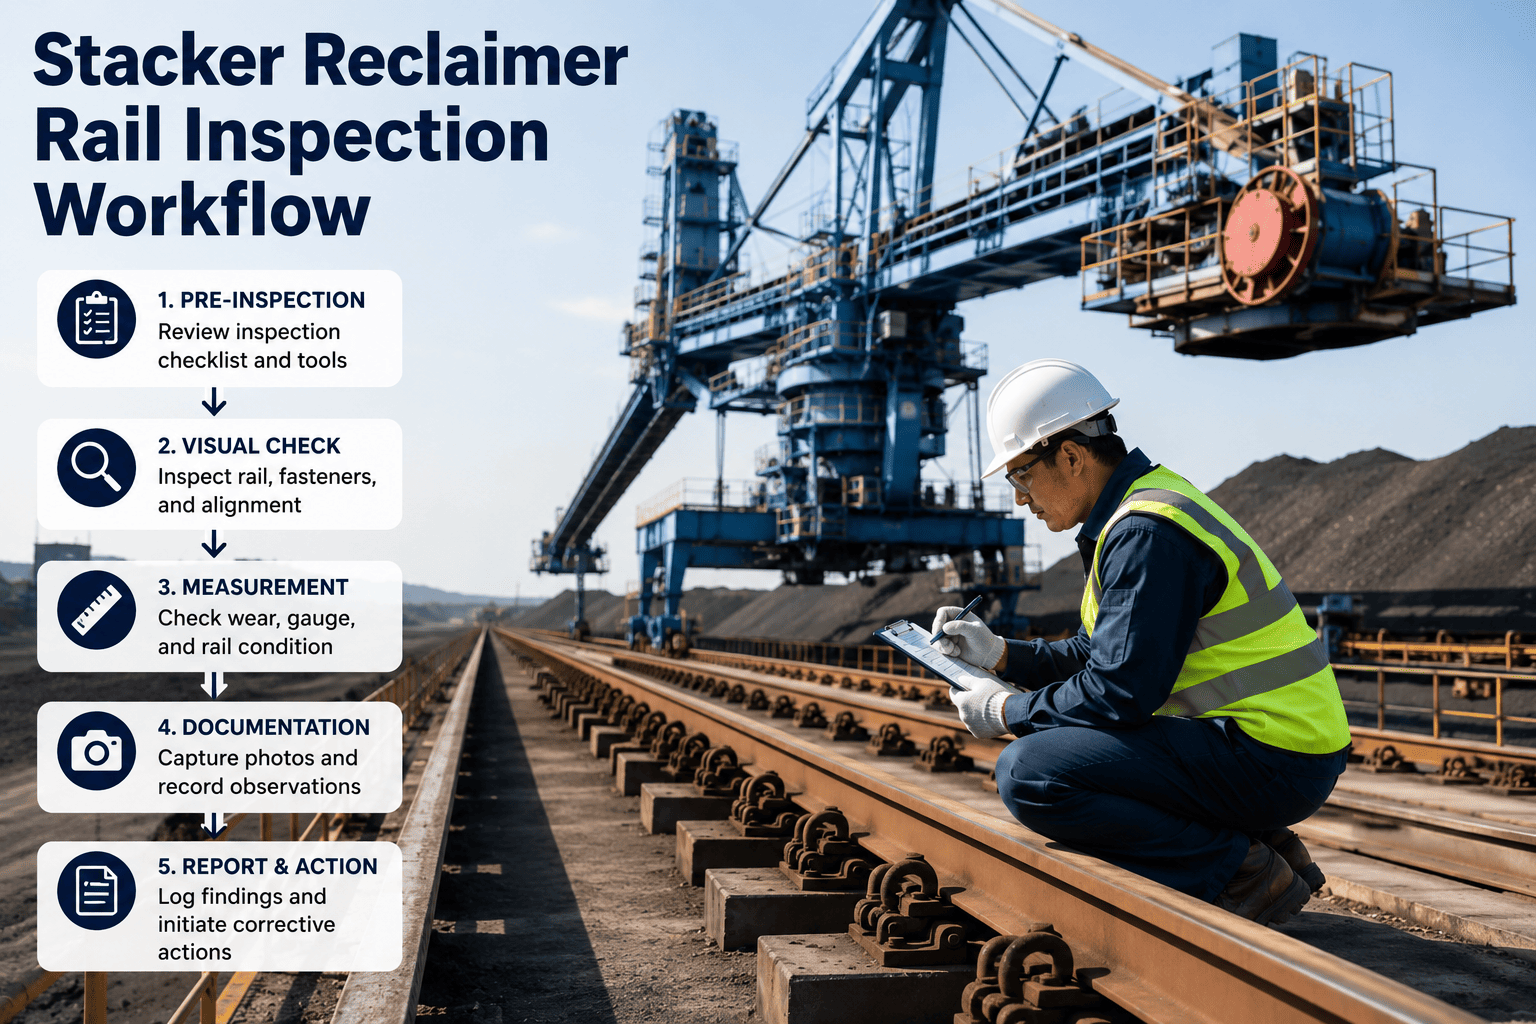
A stacker reclaimer is a machine the length of a football pitch that rolls back and forth on two steel rails all day, moving limestone into and out of the pre-blending yard. Those rails are the one component the whole machine's safety rests on — let the gauge drift, a clip loosen, or a railhead wear unevenly, and the travel wheels start fighting the track. Flange wear turns into rail climbing, and rail climbing is the leading path to a derailment that can stop the raw-material feed for weeks. This checklist gives your crews an exact, tickable rail inspection — safety, visual, measured, fasteners, and wheel interface — that they run straight from a phone. Inside OxMaint Inspection Management, every ticked reading trends over time instead of vanishing into a binder.
Stacker Reclaimer Rail Inspection Checklist
A tick-by-tick rail inspection for the travel track under your stacker reclaimer — catch gauge drift, flange wear, and loose fasteners before they climb into a derailment.
Why Small Rail Drift Becomes a Derailment
A derailment is never the first event — it is the last one in a chain that started months earlier as a millimetre of misalignment nobody logged. Every item on this checklist targets an early link in that chain.
Break the chain at step one and the fix is a torque wrench. Miss it to step four and the fix is a crane, a rebuild, and weeks of lost raw-material feed.
Pre-Inspection Setup Checklist
The rail runs the full length of the stockyard, often outdoors and dust-covered. Clear every item here so the readings you take are real and the walk is safe.
Visual Rail Walk Checklist
Walk both rails end to end before measuring anything. A repeating damage pattern on the same span is your signal to mark that section for detailed measurement.
Measured Geometry Checklist
These are the four readings that predict travel problems. Take them against the baseline — a value in tolerance today that has drifted every month is the real warning, not the single number.
Fasteners & Base Checklist
Loose fasteners let the rail shift under load and undo any alignment work. These checks keep small hardware issues from becoming geometry failures.
Wheel Interface Checklist
The rail and the wheels wear each other — a fault on one shows up as damage on the other. Compare both sides; one-sided wear is a rail-geometry symptom, not just a wheel problem.
How Often to Run Each Group
Not every group needs the same frequency. Daily eyes catch the obvious; periodic measurement catches the drift. Match the effort to the risk and the record shows a defensible, layered routine.
| Group | Frequency | Tool | Trigger to Act |
|---|---|---|---|
| B · Visual rail & debris | Daily | Eyes, torch | Visible crack, spill, or damage |
| D · Fastener / clip walk | Weekly | Torque wrench | Any loose, missing, or cracked clip |
| E · Wheel flange & flats | Weekly | Gauge, visual | Uneven or one-sided flange wear |
| C · Gauge, level, joints | Monthly | Rail gauge, level | Reading outside tolerance vs. baseline |
| Wheel & rail profile | ~500 op. hours | Profile gauge | Wear beyond OEM wheel tolerance |
| Full alignment survey | Annual / on symptom | Laser, total station | Straightness or span deviation |
Intervals are a starting point — high throughput, heavy dust, and OEM guidance all move them. What matters is that each group has an owner, an interval, and a logged reading every cycle.
Symptoms That Say "Inspect Now"
Rail problems announce themselves through the machine before they show on a drawing. When operators report any of these — especially after a wheel or bearing change — pull the checklist forward.
From Ticked Box to Trend Line
A paper rail walk tells you today's reading. It can't tell you that the gauge at joint 14 has widened half a millimetre every month for a year — which is exactly the pattern that predicts a failure. OxMaint turns the ticked checklist into a record that thinks.
What Reliability Leaders Say
The stacker never derails on the day the gauge goes bad — it derails a year later, after nobody trended the readings. Once we started ticking and plotting gauge and elevation per joint instead of filing them, we caught two slow-drifting sections and fixed them with a torque wrench. That is the difference between a work order and a crane recovery.
Our old rail walks lived in a notebook that told me nothing across time. The value isn't the single reading — it's the trend. When flange wear, power draw, and gauge drift all point at the same span, the machine is telling you where it will fail. A digital checklist finally let me hear it.
Frequently Asked Questions
How often should each group of this checklist run?
Layer the frequency to the risk: run the visual group daily, the fastener and wheel-flange groups weekly, the geometry group monthly, a wheel and rail profile check around every 500 operating hours, and a full alignment survey annually or whenever symptoms appear. High throughput, heavy dust, and OEM guidance can tighten these intervals. The key is that every group has an owner and a logged reading each cycle. Book a demo to build the cadence for your machine.
Which measurements matter most on the checklist?
Gauge (the spacing between the two rails), elevation or level difference, straightness along each rail, and joint gap are the four geometry readings that predict travel problems, alongside wheel flange wear at the interface. Small deviations rarely stop the machine immediately, but they compound into skew, accelerated wear, and eventually rail climbing. Recording them against a baseline is what turns single readings into a trend you can act on. Start free to log measurements per rail location.
What causes a stacker reclaimer to derail from the rail?
Derailment is the end of a chain: gauge or elevation drifts out of tolerance, the travel wheels begin to skew and thrust sideways, the wheel flanges wear rapidly against the railhead, and eventually a flange climbs up and over the rail. Loose or missing fasteners, worn wheels, and foundation settlement all feed the chain. Because each link is visible early, a disciplined checklist catches it while the fix is still cheap. Book a demo to catch the chain early.
Why do loose rail clips matter so much?
Rail clips apply a clamping force that holds the rail in position and resists the lateral loads from the travelling machine. When clips loosen, corrode, or go missing, the rail can shift under load, widening or narrowing the gauge and undoing any alignment work. Corroded or cracked clips should be replaced rather than simply re-tightened, because a compromised clip won't hold torque. Ticking clip condition per location keeps small hardware issues from becoming geometry failures. Start free to track fasteners by location.
How does a digital checklist improve rail inspection?
Because it turns scattered ticked readings into a trend. Instead of a notebook that only shows today's number, OxMaint ties each gauge, elevation, and fastener reading to its rail location and plots it across every inspection, so slow drift becomes a visible line long before it reaches a failure threshold. Out-of-tolerance findings open work orders automatically, and readings nearing the limit escalate to the reliability engineer. That is the difference between reacting to a derailment and preventing one. Book a demo to see the trending.
Turn Every Ticked Box Into a Trend You Can Act On
OxMaint runs this rail inspection as staged mobile checklist groups, ties every gauge, elevation, and fastener reading to its rail location, plots the drift across cycles, and opens a work order the moment a check fails — so a millimetre of misalignment becomes a torque-wrench fix instead of a crane recovery.