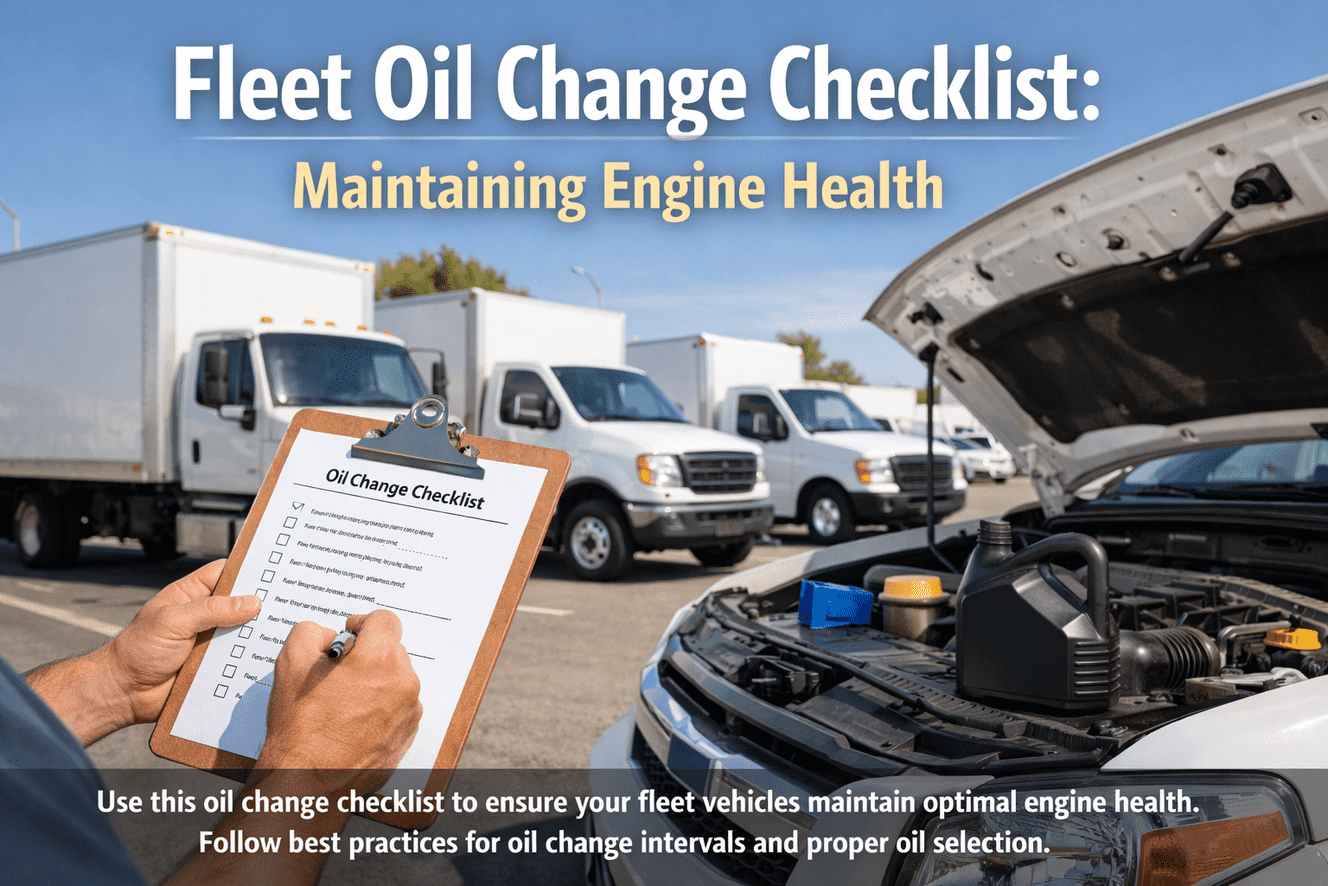
Fleet Oil Change Checklist: Maintaining Engine Health
By Kevon Urig on March 17, 2026
Engine oil is the single most consequential consumable in any commercial fleet. Get the change interval right and your engines run to their full service life — 500,000+ miles in a well-maintained commercial truck. Get it wrong and you are looking at accelerated bearing wear, sludge accumulation, and premature engine failures that average $15,000–$40,000 per replacement. The commercial vehicle market loses an estimated $12 billion annually to deferred and improperly executed oil change programs — costs that compound because oil degradation is invisible until the engine is already damaged. This checklist covers every step of a commercially correct fleet oil change: pre-service checks, oil and filter selection by application, drain and fill procedures, post-service verification, and the interval tracking framework that keeps your program on schedule across every vehicle in the fleet. Facilities using OxMaint's digital work order system execute this checklist on mobile, auto-schedule the next service, and build a complete oil change history per vehicle without paper. Book a demo to see oil change compliance tracking running against your fleet.
4Checklist Phases
36Checklist Tasks
40%Engine Life Extension
$1,200Avg Cost of Missed Oil Change
Priority:Critical Safety-critical or engine-damaging if skippedHigh Impacts performance or complianceStandard Required before phase completion
Est. 15–20 minutesTechnician + Fleet Manager Sign-OffComplete before draining oil
1.1 Vehicle and Documentation Verification
#
Task
Acceptance Criteria
Priority
Sign-Off
1.1.1
Confirm vehicle asset ID, odometer reading, and engine hours against the CMMS work order. Verify last oil change record is accessible and review oil type previously used.
Asset ID matches work order. Odometer logged. Previous oil type confirmed in CMMS history.
High
________
1.1.2
Confirm correct oil specification for this vehicle make, model, engine type, and operating environment (hot climate, cold start, heavy load). Reference OEM service manual or CMMS asset specification card.
Oil viscosity grade and specification confirmed per OEM requirement. Recorded on work order.
Critical
________
1.1.3
Confirm correct oil filter part number staged for this specific engine. Verify filter is within expiry date if applicable and packaging is intact with no damage.
Filter part number matches OEM specification. Packaging intact. Staged at vehicle.
Critical
________
1.1.4
Confirm drain plug condition and replacement crush washer or seal are available at the vehicle before work begins. Do not reuse old crush washers — they cause drain plug seep that contaminates oil.
New drain plug seal/washer staged at vehicle. Drain plug condition checked for thread damage.
High
________
1.1.5
Confirm used oil disposal container is available, labelled, and has sufficient capacity for this engine's oil volume. Verify hazardous waste disposal compliance with local regulations.
Run engine to operating temperature (minimum 5 minutes) before draining. Warm oil drains completely and carries contaminants in suspension — cold draining leaves 15–20% of degraded oil and particulates in the sump.
Coolant temperature at operating range. Engine warmed minimum 5 minutes. Recorded on work order.
Critical
________
1.2.2
Pull dipstick and assess current oil condition. Check colour (honey to dark brown = normal, black and tar-like = overdue, milky = coolant contamination). Record observation on work order before draining.
Colour recorded. If milky or fuel-contaminated, escalate to supervisor before proceeding — may indicate head gasket or injector issue.
Critical
________
1.2.3
Inspect dipstick for sludge, metallic particles, or foam. Metallic glitter in oil indicates bearing wear requiring engineering assessment before returning vehicle to service after the oil change.
No metallic particles or foam present. Sludge level noted. Escalation triggered if metallic particles found.
Critical
________
1.2.4
Inspect all external engine surfaces for active oil leaks — valve cover gaskets, front and rear main seals, oil pressure sensor connection, oil cooler lines, and filter mount base. Photograph any active leaks before draining.
All leak points inspected. Photographs taken of any active leaks. Leak log entry added to work order.
High
________
GATE 1All Phase 1 items signed off. Oil condition assessed and recorded. No unresolved escalations. Phase 2 drain procedure cannot begin until this gate is cleared.
Est. 20–35 minutesCertified TechnicianBegin after Gate 1 clearance
2.1 Oil Drain Procedure
#
Task
Acceptance Criteria
Priority
Sign-Off
2.1.1
Position drain pan under drain plug with sufficient capacity for full oil volume plus 20% overflow margin. Ensure drain pan is on level ground and cannot tip.
Drain pan centred under drain plug. Capacity confirmed sufficient. Pan stable and level.
High
________
2.1.2
Remove drain plug using correct size socket — never vice grips or adjustable spanner on hex drain plugs. Note drain plug thread condition on removal. Do not force cross-threaded plugs.
Correct socket size used. Thread condition noted. If damaged threads found, escalate — do not replace plug in stripped threads.
Critical
________
2.1.3
Allow oil to drain for minimum 8–10 minutes from a warm engine. Do not rush the drain — residual oil sitting in the sump for less than 5 minutes retains 8–12% of degraded oil volume.
Drain time minimum 8 minutes confirmed. Flow stopped to drip-only before plug reinstall. Time logged on work order.
Critical
________
2.1.4
Visually inspect drained oil in drain pan for metallic particles, coolant contamination (milky appearance), fuel dilution (thin consistency, strong fuel odour), or excessive carbon soot. Record observation on work order.
Drained oil inspected and condition recorded. Contamination escalated if coolant or metallic particles present.
Critical
________
2.1.5
Install new drain plug with new crush washer or seal. Torque to OEM specification using calibrated torque wrench — not impact gun. Over-torqued drain plugs strip sump threads and cause expensive pan replacement.
New washer installed. Torque to OEM specification (typically 25–35 Nm on light vehicles, check spec). Torque recorded on work order.
Critical
________
2.2 Oil Filter Replacement
#
Task
Acceptance Criteria
Priority
Sign-Off
2.2.1
Remove old oil filter using correct filter wrench. Cut open old filter before disposal and inspect element for metallic debris, unusual contamination, or bypass valve damage. Record any abnormal findings.
Old filter inspected and findings recorded. Metallic debris escalated to engineering if found.
High
________
2.2.2
Clean filter mount mating surface with lint-free cloth. Confirm old filter gasket has been fully removed — double gaskets are a common cause of filter blow-off at pressure, resulting in catastrophic oil loss and engine seizure.
Mount surface clean. Single gasket confirmed on new filter. Old gasket absence visually verified.
Critical
________
2.2.3
Apply thin film of fresh engine oil to new filter gasket before installation. Hand-tighten filter to gasket contact plus 3/4 turn — do not use filter wrench for installation tightening on spin-on filters.
Filter gasket lubricated. Hand-tightened to gasket contact plus 3/4 turn only. Wrench not used for install.
Critical
________
2.2.4
For canister-type filters: replace O-ring with new OEM-specified O-ring lightly coated in fresh oil. Torque canister cap to OEM specification using torque wrench. Record torque value on work order.
New O-ring fitted and lubricated. Cap torqued to OEM specification (record actual torque). Applicable to canister filters only.
Critical
________
2.3 Oil Fill and Level Verification
#
Task
Acceptance Criteria
Priority
Sign-Off
2.3.1
Fill engine with correct oil to OEM specified capacity — do not rely on approximation. Use calibrated measuring vessel. Record volume added on work order. Never overfill — overfilling by 10% causes oil aeration, foam, and accelerated bearing wear.
Exact OEM specified volume added using calibrated container. Volume recorded on work order. No overfill.
Critical
________
2.3.2
Start engine and run at idle for 60–90 seconds. Verify oil pressure warning light extinguishes within 5 seconds of startup. Check oil pressure gauge reading is within normal operating range. Shut down immediately if oil pressure light remains on.
Oil pressure light off within 5 seconds. Gauge in normal range. If light persists, shut down and investigate before any further running.
Critical
________
2.3.3
Shut engine down after initial run. Wait 3–5 minutes for oil to settle back into sump. Check dipstick level — should read between upper and lower marks. Add or remove oil to achieve mid-to-upper range.
Dipstick reading between Min and Max marks, ideally at upper half. Level recorded on work order.
Critical
________
GATE 2Drain plug torqued and sealed. Filter installed and verified. Correct oil volume filled. Oil pressure confirmed normal. Phase 3 post-service checks cannot begin until Gate 2 is cleared.
40% Longer Engine Life
Fleets running structured digital oil change checklists through OxMaint extend engine service life by up to 40% versus paper-based or informal programs — with automated interval scheduling eliminating missed changes. See the oil change workflow live.
Post-Service Leak Check, Fluid Top-Up, and Documentation
Est. 15–20 minutesTechnician + QA CheckBegin after Gate 2 clearance
3.1 Leak Verification and Related Fluid Checks
#
Check Item
Pass Criteria and Recorded Result
Priority
Sign-Off
3.1.1
After 60-second engine run, inspect drain plug area and oil filter mount for active seepage. Place clean white paper towel under each point and check after 3 minutes at idle.
No oil on paper towel at drain plug or filter mount. If seepage found, shut down and re-torque before release.
Critical
________
3.1.2
Inspect all engine gasket surfaces disturbed or near-disturbed during service for oil weeping. Include valve cover gasket perimeter, front cover seal, and any oil cooler connections that were disturbed.
No active seepage from any gasket surface. Pre-existing seeps noted and logged as existing defects.
High
________
3.1.3
Check and top up coolant level, power steering fluid, brake fluid, washer fluid, and transmission fluid dipstick as part of the oil change service. Record any fluid at or below minimum level as a flagged deficiency on the work order.
All fluids checked. Any at or below minimum flagged on work order with technician name and date. Top-up volumes recorded.
High
________
3.1.4
Check air filter condition by visual inspection — dust-loaded filters increase fuel consumption by 8–12% and reduce engine performance. Flag for replacement if loading is above 50% of element capacity. Cabin air filter inspected concurrently.
Air filter condition rated and recorded. Replacement flagged on work order if indicated. Cabin filter inspected and status noted.
Standard
________
3.1.5
Road test vehicle for minimum 5 minutes. Monitor dashboard for oil pressure, temperature, or engine warning lights. Check for smoke from exhaust — blue smoke indicates oil burning and requires investigation before the vehicle returns to full service.
No warning lights during road test. No blue smoke. Oil pressure and temperature normal throughout. Road test time and distance logged.
Critical
________
3.2 Work Order Close-Out and CMMS Update
#
Documentation Task
Required Before Work Order Closure
Priority
Sign-Off
3.2.1
Record all parts used against work order in CMMS: oil brand, viscosity grade, volume added, filter part number, and drain plug washer part number. Update parts inventory accordingly.
All parts recorded in CMMS work order. Inventory deducted automatically. Parts cost captured against vehicle asset.
High
________
3.2.2
Record total labour time against work order. Update oil change service sticker in vehicle with date, odometer, and next service due odometer or date. Ensure sticker is legible and correctly positioned on windscreen.
Labour time recorded. Sticker completed with next service interval clearly shown. Next interval confirmed against CMMS schedule.
High
________
3.2.3
Update vehicle asset record in CMMS with current oil condition score, any deficiencies found, oil change date, odometer at service, and next service due date or mileage. Close work order with technician digital signature.
CMMS asset record updated. Work order closed with technician signature. Next service auto-scheduled in CMMS.
Critical
________
GATE 3Leak checks passed. Road test completed. CMMS updated. Next service scheduled. Vehicle can be released to fleet service after Gate 3 is cleared.
Auto-Scheduled Next Service
OxMaint auto-schedules the next oil change at work order closure — based on mileage trigger, engine hours, or calendar interval per vehicle type. Zero manual reminder setup. Book a demo to see auto-scheduling live.
Oil Change Interval Management and Fleet-Level Tracking
Ongoing Program ManagementFleet ManagerApplies across all fleet vehicles
Interval management is where most fleet oil programs fail. Fixed mileage intervals ignore engine hours accumulated during idle-heavy operations, extreme temperature effects on oil degradation, and high-load duty cycles that accelerate oil breakdown. Use the framework below to set vehicle-specific intervals rather than fleet-wide averages.
4.1 Oil Change Interval Reference by Vehicle Type and Operating Condition
#
Vehicle Type and Operating Condition
Recommended Interval — Conventional / Synthetic
Priority
Interval Set
4.1.1
Light commercial vehicles (vans, pickups) — standard highway duty, moderate loads, consistent temperature range.
Conventional: 5,000 miles / 8,000 km. Synthetic: 7,500–10,000 miles. Check OEM specification first.
Standard
________
4.1.2
Light commercial vehicles — severe duty (frequent short trips under 10 minutes, stop-start urban delivery, towing at or near rated capacity, dusty environment).
Conventional: 15,000–25,000 miles (engine hours-adjusted). Synthetic with oil analysis program: up to 50,000 miles. OEM and oil analysis mandatory.
Critical
________
4.1.5
All fleet vehicles operating in extreme cold (below -20°C / -4°F) — cold starts accelerate oil degradation and increase engine wear during warm-up phase.
Reduce interval by 20–25% in sustained cold climates. Use OEM-specified cold-climate viscosity grade. Block heaters recommended.
High
________
4.1.6
Vehicles with documented oil consumption above 1 litre per 1,000 km — high consumption vehicles require more frequent oil level monitoring and potentially shorter change intervals until the consumption cause is identified.
Weekly oil level checks scheduled in CMMS. Consumption rate logged per vehicle. Engineering review if consumption exceeds 1L/1,000 km persistently.
Critical
________
COMPLETEAll four phases signed off. Oil change complete. CMMS updated. Interval set per vehicle type. Next service auto-scheduled. Vehicle authorised for full fleet service.
Oil Change KPIs Every Fleet Manager Should Track in Their CMMS
Executing oil changes correctly is half the program. Measuring the program's effectiveness across the fleet is what separates proactive fleet managers from those perpetually reacting to engine failures. OxMaint calculates every one of these KPIs automatically from your work order data.
85%+
PM Completion Rate Target
Percentage of scheduled oil changes completed on time vs. total due. Industry benchmark is 85% or higher. Below 70% indicates a scheduling or resource gap that predicts engine failures within 6–12 months.
Reactive fleets: 55–65%OxMaint fleets: 92%+
$0.08
Oil Maintenance Cost Per Mile
Total oil change cost (labour + parts) divided by miles driven per vehicle. Rising cost per mile on a specific vehicle signals oil consumption or shortened interval needs — detectable months before engine failure occurs.
Industry avg: $0.12–0.18/mileOptimised: $0.06–0.09/mile
0%
Oil Change Overdue Rate
Percentage of fleet vehicles currently past their oil change due mileage or date. Each percentage point above zero represents statistically elevated engine failure risk across that vehicle cohort within the next 60 days.
Common without CMMS: 18–35%Target: 0% with auto-scheduling
1L
Oil Consumption Threshold
Maximum acceptable oil consumption of 1 litre per 1,000 km before investigation is required. Higher consumption indicates worn valve stem seals, piston rings, or turbocharger seal issues — all precursors to expensive engine failure events.
Investigate: above 1L/1,000 kmNormal: under 0.5L/1,000 km
Replace Paper Oil Change Checklists with OxMaint Digital Fleet Maintenance.
Every task, gate, and sign-off captured on mobile. Oil change history archived automatically against each vehicle asset record. Next service auto-scheduled at work order closure. Fleet-wide compliance dashboard shows every overdue vehicle at a glance. Free to start. Deploys in days.
Common questions from fleet managers implementing structured oil change programs. Sign up free or book a demo to see OxMaint's oil change workflow configured for your fleet.
How do I set the right oil change interval for each vehicle in our mixed fleet?
Set intervals per vehicle based on three inputs: OEM specification (always the starting point), operating duty cycle (severe duty shortens intervals by 30–40%), and oil analysis results (the most accurate interval optimization method for high-value assets). OxMaint stores per-vehicle interval settings and auto-triggers service reminders at the correct mileage or engine hour threshold for each asset. Book a demo to see per-vehicle interval configuration, or sign up free to start building your fleet's interval program today.
What does milky or contaminated oil found during an oil change actually mean for the engine?
Milky oil indicates coolant contamination — almost always caused by a blown head gasket, cracked cylinder head, or failed oil cooler. Do not return the vehicle to service without investigation and repair. Driving with coolant-contaminated oil causes bearing failure within hours. Black, tar-like oil simply means the interval was overdue. Metallic glitter in oil indicates bearing wear and requires an engineering assessment before restart. Sign up free to track contamination findings in your CMMS asset history.
Can OxMaint manage oil change schedules across a multi-depot fleet with vehicles at different locations?
Yes. OxMaint is a multi-site platform — a single deployment covers all depot locations with site-specific technician assignments and work order routing per vehicle home base. Fleet managers see every vehicle's oil change status across all depots from a single dashboard, with overdue alerts surfaced automatically. Cross-site compliance benchmarking identifies which depots have the lowest PM completion rates. Book a demo to see multi-depot oil change tracking live, or sign up free to configure your fleet today.
How does OxMaint help track oil consumption per vehicle — and at what point should we investigate?
OxMaint records oil volume added at every service event against the vehicle asset record, enabling per-vehicle oil consumption rate calculation over time. Investigate immediately when consumption exceeds 1 litre per 1,000 km — this threshold indicates worn valve seals, piston rings, or turbo issues. OxMaint can flag high-consumption vehicles automatically and schedule interim oil level checks between full services. Sign up free to activate oil consumption tracking, or book a demo for a fleet health dashboard walkthrough.
Deploy This Oil Change Checklist Digitally with OxMaint.
Every task in this checklist exists inside OxMaint as a configurable digital work order — completed on mobile, signed off at each gate, and archived automatically against each vehicle's service history. Auto-scheduling eliminates missed oil changes. Fleet-wide compliance dashboards surface every at-risk vehicle before the engine pays the price. Free to start, no credit card required.