Food Processing Conveyor Belt Inspection Checklist

By Sauren Jin on March 2, 2026

food-processing-conveyor-belt-inspection-checklist

A poultry processing plant in Georgia lost an entire third-shift production run — 22,000 lbs of finished product — when a worn conveyor belt shed a 4-inch strip of material into the packaging line at 2 AM. The belt had shown visible edge fraying for weeks, but without a structured inspection checklist, three shifts of operators walked past it without documenting the deterioration. The resulting voluntary recall cost $1.8 million in direct expenses, triggered an FDA investigation, and took the line offline for nine days. A single checklist completed once per shift would have flagged the belt condition at Stage 1 and prevented the failure entirely. Foreign material contamination was the number one cause of USDA food recalls in 2025, responsible for 13 out of 42 total recalls affecting over 71 million pounds of product. Your conveyor belts are either your safeguard or your biggest liability — it depends entirely on whether they are being inspected. Sign up for Oxmaint to digitize your conveyor inspection checklists and eliminate the gaps that lead to contamination events.


Checklist / Production Line Equipment

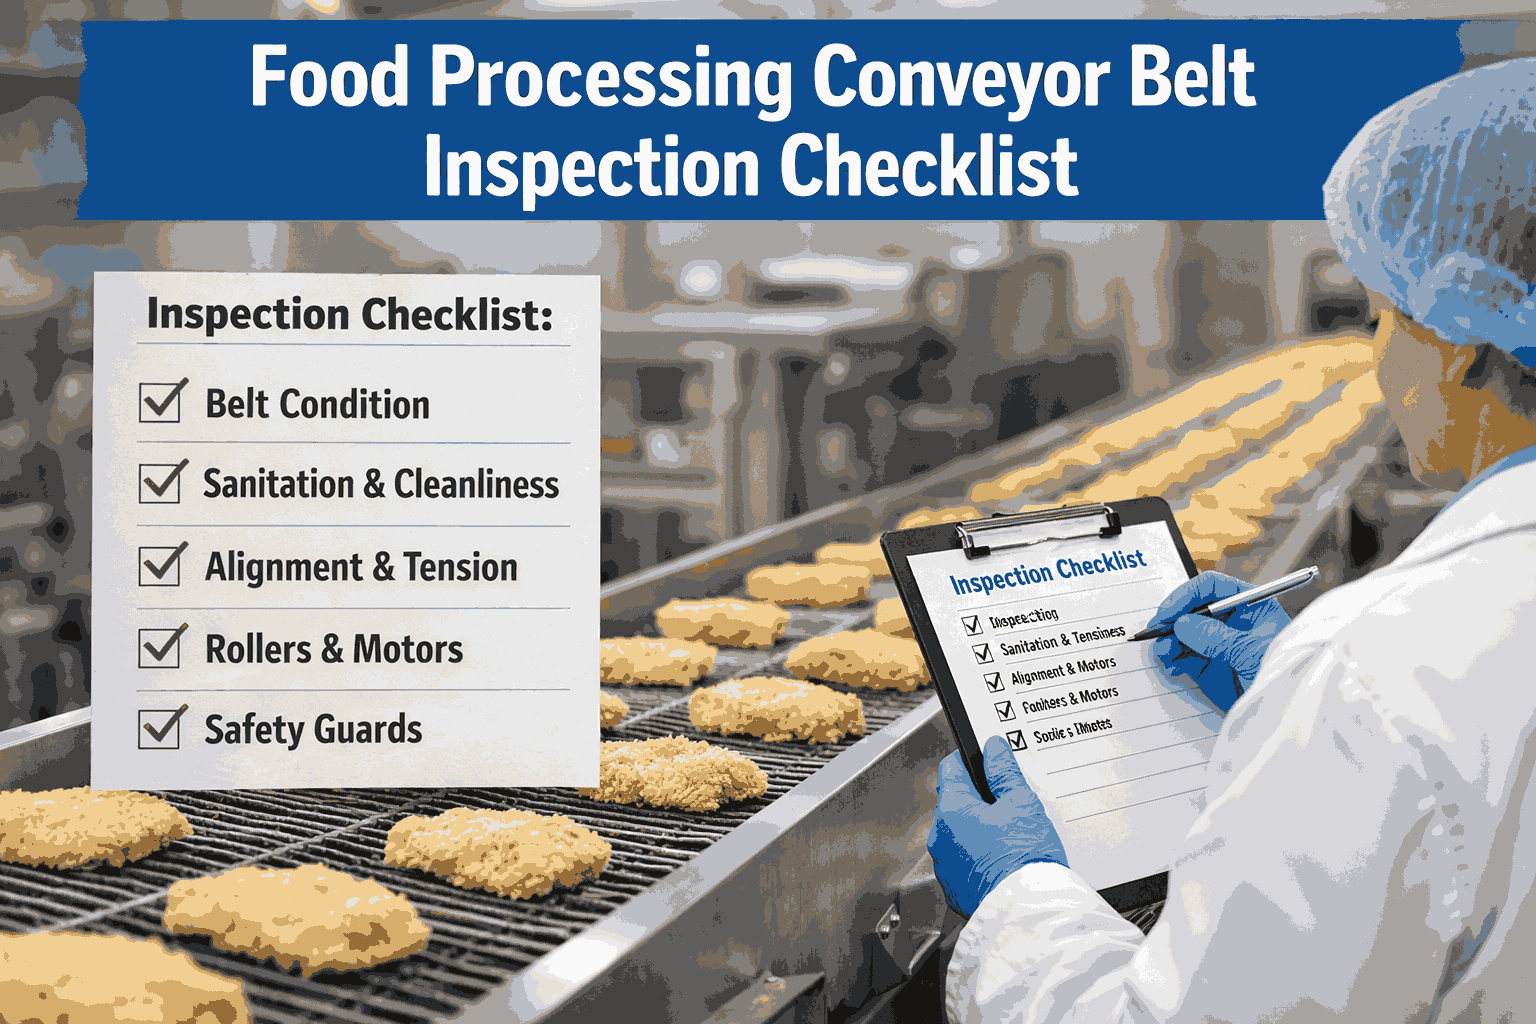
Food Processing Conveyor Belt Inspection Checklist

Conveyor belts are the single largest food-contact surface in most processing plants — and the most frequently overlooked during routine inspections. This checklist covers every critical inspection point, organized by zone, so your team catches belt degradation, contamination risks, and mechanical failures before they reach your product.

68%
of belt failures are predictable with routine inspection

$47K
average cost of one unplanned conveyor stoppage

longer belt life with a structured PM program

40%
downtime reduction after CMMS-based checklists
Why It Matters

Why Conveyor Inspection Can't Be Optional

Conveyor systems are the circulatory system of every food processing line. When they fail, everything stops. When they contaminate, everything recalls. These numbers show what is at stake when inspections are skipped or incomplete.

$10M
Average direct cost of a food recall event
Not including brand damage or lost retail partnerships
#1
Foreign material is the top cause of USDA recalls in 2025
13 of 42 total recalls — more than bacterial hazards
$25K/hr
Upper range of unplanned conveyor downtime cost
Includes lost product, idle labor, and schedule disruption
48M
Americans affected by foodborne illness annually
CDC: 128,000 hospitalizations and 3,000 deaths per year
The Complete Checklist

Conveyor Belt Inspection Checklist — Organized by Zone

Organized by inspection zone — not by calendar frequency — so technicians understand exactly what to check and why. Each zone targets a different failure mode. Sign up for Oxmaint to deploy this checklist digitally across all shifts with photo verification and automatic escalation.

ZONE 1
Belt Surface & Material Contact Area
Failure risk: Product contamination, foreign material, recall

Belt surface integrity — Inspect entire belt surface for cuts, cracks, gouges, abrasions, or embedded debris. Any surface break is a contamination entry point that requires immediate documentation and escalation before the next production run begins.

Edge condition — Check both belt edges for fraying, delamination, or material separation. Edge fragments are the most common foreign material source from conveyors and the leading trigger for USDA recall events in protein processing facilities.

Belt splice condition — Examine mechanical splices for thinning, pin breakage, or fastener opening. Splices are the highest-failure-rate point on any belt. A failing splice gives 48–72 hours of warning before catastrophic separation if inspected every shift.

Product residue and carryback — Check for material stuck to or embedded in the belt that was not removed during the last sanitation cycle. Carryback causes cross-contamination between production runs and accelerates belt degradation through abrasive action.

Sanitation verification — Confirm ATP swab results are below your facility threshold (typically under 10 RLU) before production startup. Document results with technician name, timestamp, and zone location for audit trail continuity.
ZONE 2
Drive System & Mechanical Components
Failure risk: Unplanned downtime, belt damage, production halt

Belt tension — Verify tension is within manufacturer spec. Too tight accelerates bearing and belt wear; too loose causes slippage, belt mistracking, and product spillage at transfer points. Document tension measurements monthly to build a degradation baseline.

Belt tracking and alignment — Confirm belt runs centered on all rollers. Misalignment is the leading cause of premature belt failure and product spillage. A belt drifting more than 1 inch from center requires immediate correction before it contacts the frame.

Motor temperature and noise — Check drive motor for abnormal heat or unusual sounds. Document temperature monthly to track degradation trends. A motor running 20°F above baseline without load change indicates bearing wear or impending winding failure.

Roller and idler condition — Spin rollers by hand during downtime to check for resistance, roughness, or seizure. One failed roller cascades stress across the entire system, accelerating belt wear and increasing motor load. Replace seized rollers within the same maintenance window.

Gearbox inspection — Listen for abnormal gearbox noise. Check for oil leaks and excessive heat. Document and trend findings over time. A gearbox showing early noise anomalies typically provides 3–6 weeks of lead time before failure if trended correctly.

Bearing lubrication — Verify all bearings are lubricated with food-grade grease per schedule. Over-lubrication is as damaging as under-lubrication in food environments — excess grease contacts product zones and creates contamination risk. Use cycle-count triggers, not calendar days only.
ZONE 3
Safety Systems & Guards
Failure risk: Worker injury, OSHA citation, production shutdown

Emergency stop function — Test every E-stop along the conveyor line. Confirm each one halts the belt completely within the required stopping distance. Document test results by location and shift. A non-functional E-stop is an immediate OSHA citation and production stoppage.

Pull cord operation — Test pull cord switches along the full conveyor length. Verify they trigger a complete stop and alarm. Pull cords frequently fail silently — a cord that looks intact but does not activate is invisible until a worker needs it during an emergency.

Pinch point guards — Confirm all guards around head/tail drums, pulleys, sprockets, and coupling points are in position and securely fastened. Guards removed for maintenance are frequently not reinstalled correctly. Photographic documentation proves compliance at every shift.

Warning labels and signage — Verify all safety stickers and warning signs are present, legible, and not obscured by product buildup or cleaning damage. Deteriorated or missing safety labels are cited in approximately 22% of OSHA food processing inspections as a contributing violation.
ZONE 4
Sanitation & Hygiene Compliance
Failure risk: Pathogen growth, audit failure, regulatory action

Underside and returnway cleanliness — Inspect the belt underside and return path for product buildup, biofilm, or debris accumulation. These hidden areas are primary pathogen harborage sites and are frequently missed because they require deliberate inspection effort outside the normal line of sight.

Frame and support structure — Check conveyor frame, legs, and supports for product accumulation, standing water, or corrosion that could transfer contaminants to the belt. Frame harborage is the number two cited finding in FDA FSMA inspections of conveyor systems.

Chemical residue check — Verify no cleaning chemical remains on belt contact surfaces after sanitation. Chemical residue transfers to product and causes indirect contamination that is extremely difficult to detect without systematic post-sanitation verification as part of every shift startup protocol.

Drain and drainage zone condition — Confirm all drains under conveyor systems are clear, flowing, and not backing up. Standing water under conveyor equipment creates aerosol pathogen risk during line startup and is a persistent source of post-sanitation environmental positives in raw protein environments.
Deploy this checklist digitally — across every shift, every line, every site.
Oxmaint enforces completion, captures photos, auto-escalates failures, and generates audit-ready reports instantly. No paper. No gaps.
Early Warning Signals

5 Warning Signs Your Conveyors Are About to Fail

These are the early indicators that experienced technicians catch — and that untrained operators walk past every shift. If your inspection checklist does not specifically call these out, your team is missing them.

CRITICAL
Belt Edge Fraying
Visible fibers or material peeling from belt edges. Leads directly to foreign material contamination and is the most common conveyor-related recall trigger. Every shift that passes without documentation compounds the liability.
Action: Remove belt from service immediately. Document and replace.
HIGH RISK
Unusual Noise or Vibration
Grinding, squealing, or rhythmic thumping during operation indicates bearing failure, roller seizure, or pulley misalignment developing under load. Noise is never cosmetic — it is a mechanical distress signal.
Action: Schedule inspection within 24 hours. Monitor hourly until resolved.
HIGH RISK
Belt Drifting or Mistracking
Belt consistently running to one side causes accelerated edge wear, product spillage, and uneven load on drive components. Cascades into multiple failures if uncorrected within 48 hours of first observation.
Action: Check tension, roller alignment, and load distribution. Correct within current shift.
MONITOR
Motor Running Hot
Elevated motor temperature beyond documented baseline suggests increased friction from belt tension, bearing degradation, or gearbox issues developing gradually. A 20°F rise above baseline requires investigation within 72 hours.
Action: Document temperature. Compare to baseline. Schedule detailed inspection if trending upward.
MONITOR
Product Spillage or Buildup
Material accumulating along conveyor edges, at transfer points, or on the floor beneath the belt signals misalignment, belt wear, or overloading beyond rated capacity. Spillage that recurs after cleaning is always a mechanical problem.
Action: Clean immediately. Investigate root cause. Adjust loading if overweight.
Inspection Frequency

Recommended Inspection Frequency

Inspection frequency should match your operating conditions. Plants running 24/7, processing raw proteins, or operating in wet and cold environments need tighter intervals than dry-goods facilities running single shifts.

Inspection Task
Frequency
Performed By
Belt surface visual check and sanitation verification
Every Shift
Line Operator
E-stop and safety guard verification
Every Shift
Line Operator
Belt tracking, tension, and alignment check
Weekly
Maintenance Tech
Roller, idler, and bearing inspection
Weekly
Maintenance Tech
Motor temperature, gearbox, and drive inspection
Monthly
Maintenance Tech
Belt splice integrity and wear measurement
Monthly
Maintenance Tech
Full conveyor system audit with documentation
Quarterly
Maintenance Lead + QA
Paper vs. Digital

Paper Checklists vs. Oxmaint Digital Inspections

The inspection itself is only half the value. What happens after the inspection — documentation, escalation, trend tracking — is where digital checklists transform your food safety outcomes. Sign up for Oxmaint to make the switch.

Paper Checklists
Traditional shift documentation methods
Completed and filed — never reviewed
No photo evidence of conditions found
Failed items require verbal escalation
Trends invisible across shifts and weeks
Audit prep requires manual file assembly
35% of issues lost at shift change
Oxmaint Digital Checklists
Digital shift-based inspection tracking
Every response timestamped and stored
Photo verification required for critical items
Failed items auto-generate work orders
Trend dashboards show patterns across time
Audit-ready reports generated instantly
Zero information loss between shifts
Regulatory Compliance

How This Checklist Satisfies FDA and GFSI Requirements

Food manufacturing maintenance operates under multiple overlapping regulatory requirements. A digitized, shift-enforced conveyor inspection program directly addresses each framework with timestamped, auditable evidence.

FDA FSMA

Preventive Controls for Human Food requires documented equipment maintenance as part of your Food Safety Plan. Digital conveyor inspection records with technician signatures, ATP swab results, and corrective action logs satisfy this requirement completely — and are retrievable on demand during unannounced inspections.

SQF Edition 9

SQF requires a documented, implemented preventive maintenance program covering all food contact equipment. Oxmaint's complete audit trail — every inspection, every corrective action, every PM completion — provides the evidence package that SQF auditors request at both facility and corporate levels during certification audits.

BRC Issue 9

BRC requires a planned preventive maintenance system with documented records demonstrating consistent implementation. A digitized checklist run through a CMMS ensures every shift produces compliant records regardless of staffing changes, technician turnover, or operational variation across the year.

HACCP / HARPC

Equipment maintenance is a prerequisite program under HACCP and HARPC frameworks. Conveyor belt condition directly affects Critical Control Points in protein and produce processing environments. Documented shift inspections provide the verification records that demonstrate your CCPs are protected by your maintenance program.

Ready to run compliant, audit-ready inspections on every conveyor — every shift?
Oxmaint gives your team digital checklists, automatic escalation, photo documentation, and instant audit reports across all lines and all facilities.
Frequently Asked Questions

Conveyor Belt Inspection — Questions Answered

These are the questions that maintenance directors, food safety managers, and plant engineers ask most often when evaluating a structured conveyor inspection program.

How often should conveyor belts be inspected in a food processing plant?
Belt surface and sanitation checks should happen every shift — before production starts and after every sanitation cycle. Mechanical components like tension, alignment, and bearings should be checked weekly. Full system audits with complete documentation should be quarterly. Plants processing raw proteins or operating in wet environments should increase surface inspection frequency to twice per shift. Sign up for Oxmaint to automate your inspection scheduling across all conveyor assets.
What are the most common causes of conveyor belt failure in food plants?
Belt misalignment is the single leading cause, responsible for approximately 40% of premature belt replacements. It is followed by splice failure, bearing seizure, and product buildup causing excess friction. In food environments, aggressive washdown chemicals can also degrade belt material faster than expected if chemical compatibility is not verified during belt selection. All of these failure modes are catchable with consistent inspection protocols run every shift.
How does a digital checklist prevent contamination better than paper?
Digital checklists enforce completion — technicians cannot skip items without the system flagging the omission. Photo verification proves conditions were actually inspected, not just checked off. Automatic escalation ensures failed items generate work orders immediately instead of waiting for verbal handoffs that may never happen. The result is zero documentation gaps for auditors to find. Book a demo to see how Oxmaint's inspection workflows work in food environments.
What documentation do FDA and GFSI auditors expect for conveyor maintenance?
Auditors expect written procedures, evidence of consistent execution, corrective action records for any findings, and a demonstrated link between your maintenance program and your food safety hazard analysis. Specifically, they look for: timestamped inspection records, technician sign-off documentation, ATP swab results and trending, corrective action closure records, and PM completion rates by equipment and date range. A CMMS generates all of this automatically as inspections are completed.
Can inspection checklists be adapted for different conveyor types?
Yes, and this is essential — a flat-belt conveyor in a dry bakery has different inspection priorities than a modular plastic belt conveyor in a raw poultry chilling line. Oxmaint allows you to build asset-specific checklists for each conveyor in your facility, with different task sets, frequencies, and required documentation. Templates built for one conveyor type can be copied and modified for similar equipment across multiple lines or facilities, reducing setup time significantly.
How do we handle conveyor inspection during production versus during downtime?
Most visual inspections — belt surface, edge condition, tracking, and safety guard checks — can and should occur during production at startup and during scheduled line observations. Tasks requiring physical contact — bearing spin checks, splice measurement, lubrication, and tension adjustment — must occur during planned downtime or sanitation windows. Oxmaint separates production-safe and shutdown-required tasks automatically, scheduling shutdown tasks during your planned sanitation or changeover windows so they do not compete with production time.
What happens when an inspector finds a defect during a conveyor inspection?
In a paper-based system, the finding is noted and may or may not reach the right person in time. In Oxmaint, a failed checklist item automatically generates a corrective work order, notifies the maintenance planner and shift supervisor, requires a photo of the finding, and tracks the issue to closure. The entire corrective action chain — finding, notification, work order, repair, verification — is documented in a single timestamped record that satisfies both internal QA and external auditor requirements without any manual paperwork.
How long does it take to implement a CMMS-based conveyor inspection program?
With Oxmaint's pre-built food industry templates, most facilities configure their conveyor asset registry and activate their first inspection checklists within 7 to 10 days. Technicians complete their first digital inspection in the same week. Meaningful trend data — the kind that catches developing failures before they reach the production floor — begins accumulating within 3 to 4 weeks of consistent use. The first prevented failure on a well-maintained fleet typically occurs within 30 to 60 days of full activation. Sign up for Oxmaint to start your program this week.
Start Today

Your Conveyors Run Every Shift. Your Inspection Program Should Too.

Oxmaint gives food processing teams the digital checklists, photo verification, automatic work orders, and audit-ready reports needed to protect every conveyor line — across every shift, every facility, every product type. Stop finding belt failures after they contaminate product. Start catching them three shifts before they matter.


Share This Story, Choose Your Platform!