Brake system failures are the single most cited out-of-service category at DOT roadside inspections — accounting for 34% of all CMV OOS orders — yet the majority are preventable with structured inspection and maintenance at the correct intervals. A brake technician who completes every item in a rigorous, documented brake inspection programme catches worn linings, over-stroke chambers, seized calipers, and deteriorating air lines weeks before they generate a roadside citation or, worse, a stopping distance failure. Oxmaint's brake inspection module digitises every check, records measurements per axle and wheel position, and auto-generates repair work orders for every finding — keeping your fleet's brake systems compliant, documented, and DOT-ready at all times.
Brake Wear Thresholds — Know Before You Inspect
Understanding the accept, monitor, and replace thresholds before picking up a gauge is what separates a proficient brake technician from one who guesses. The threshold chart below shows the measurement bands for the most critical brake wear items — so you know what you are looking for before you start measuring, not after.
Non-steer axle
Steer axle
All axles
Type 30 chamber
System loss rate
How Technology Is Transforming Brake Inspection
Manual brake inspection with calipers and pressure gauges remains the foundation — but four technologies now extend what a brake technician can detect, predict, and record, reducing inspection time, improving accuracy, and connecting every finding to a traceable digital record. Oxmaint integrates all four into the same brake inspection workflow your technicians already use.
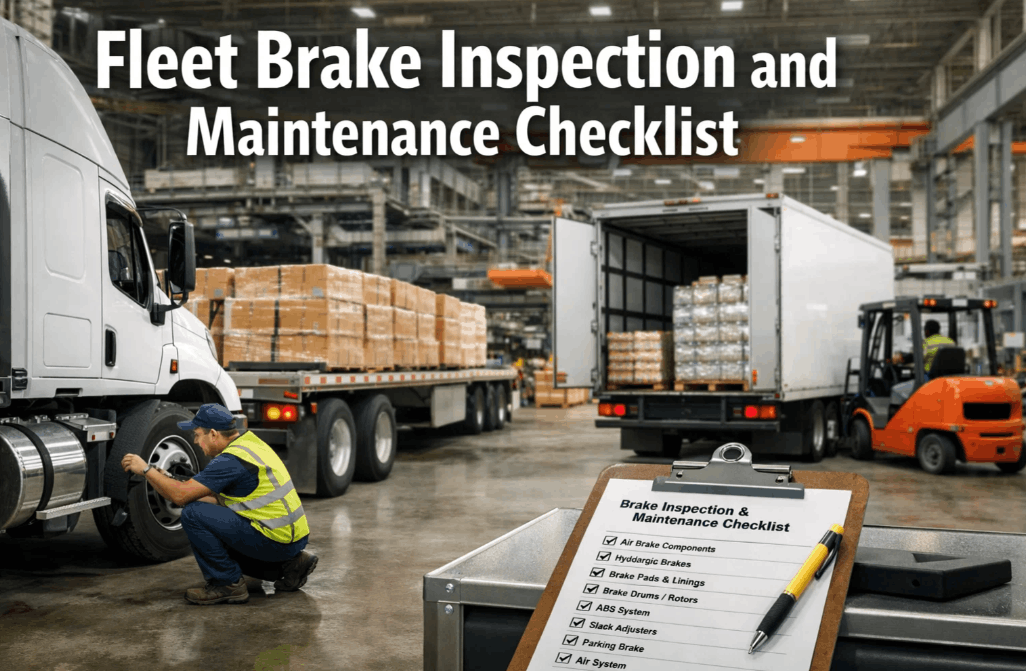
1. Air Brake System Checklist
Air brake systems power the majority of commercial vehicles over 26,001 lbs GVWR. Every air brake component must be inspected — not tested by driver feel alone. Pressure build, hold, and chamber stroke measurements are the three most commonly missed items in informal brake checks and the three most cited in DOT enforcement actions. Record air brake measurements per axle with Oxmaint's digital brake inspection forms.
Air pressure build time — primary and secondary circuits
With engine at high idle, time pressure build from 85 psi to 100 psi. Maximum allowable build time: 25 seconds for most vehicles. Pressure must build to governor cut-out (120–135 psi) without exceeding 3 minutes from ambient. Slow build indicates a compressor or governor fault requiring investigation. Defect — slow build
Pressure hold test — leak rate measurement
With brakes unapplied, loss must not exceed 2 psi/min (single) or 3 psi/min (combination). With brakes applied, loss must not exceed 3 psi/min (single) or 4 psi/min (combination). Any system exceeding these rates has a leak requiring physical inspection of all lines, fittings, and valve bodies. OOS — above limit
Low air warning — activation pressure
Drain air pressure slowly. Warning device (light and buzzer) must activate at or above 60 psi. Spring brakes must apply automatically when pressure drops to 20–45 psi. A warning that activates below 60 psi or spring brakes that don't apply in the correct pressure range are both OOS conditions. OOS — wrong pressure
Pushrod stroke — all chambers measured at 90 psi
Apply brakes at 90 psi and measure pushrod stroke at every chamber. Compare to the applicable readjustment limit from Appendix A Table (varies by chamber type — Type 20: 2", Type 24: 2", Type 30: 2.5"). Any chamber at or beyond the limit is OOS — this is the most frequently missed measurement at informal brake checks. OOS — at limit
Air compressor output and governor cut-in/cut-out
Governor must cut out at 120–135 psi and cut in at 100–120 psi. Compressor output must recover the system from cut-in to cut-out in under 25 seconds at high idle. Check air dryer purge cycle — a dryer that does not purge causes moisture accumulation that corrodes valves and chambers from inside. Defect — no purge cycle
Air lines, hoses, and fittings — full system inspection
Inspect all air lines for chafing, kinking, and heat damage from exhaust proximity. Check all push-to-connect and compression fittings for leaks — apply soapy water to each connection point. Any line abraded to the reinforcement layer is OOS. Check glad hand seals on combination vehicles — cracked or missing seals cause air leaks that reduce braking force to the trailer. OOS — abraded to cord
Brake chambers — mounting and damage inspection
Check all brake chambers for secure mounting — loose mounting bolts allow the chamber to shift under application, changing pushrod geometry and effective braking force. Inspect chamber bodies for cracks, dents, or corrosion. Check diaphragm for failure indicators — a weeping chamber diaphragm causes progressive air loss. Defect — loose mounting
OBD Integration tip: Air brake system fault codes — including ABS valve faults, pressure sensor failures, and compressor DTCs — appear in OBD data before physical symptoms are detectable by the driver. Oxmaint pulls these codes directly into brake inspection pre-check records, directing technician attention to the highest-risk components first. See Oxmaint's OBD brake fault integration.
2. Brake Linings, Drums and Rotors Checklist
Lining, drum, and rotor condition must be measured — not estimated. A technician who estimates lining thickness visually will miss borderline conditions that a gauge catches. Every wheel position must be individually inspected, and measurements must be recorded per position to support the trend analysis that predicts the next replacement interval.
Disc brake pad thickness — all wheel positions
Measure pad thickness with a caliper at the thinnest point. OOS criteria under FMCSA §393.47: 1/4" or less on non-steering axles; 1/8" or less on steering axles. Record measurement per wheel position — not an average. Log measurements in the vehicle's service record to calculate wear rate and predict next replacement date. OOS — at/below limit
Drum brake lining thickness — all positions
Measure lining at mid-point using a brake shoe gauge. OOS: 2mm or less on any non-steering axle drum brake. Check lining-to-drum clearance — excessive clearance on manual adjusters indicates the adjuster has not been serviced correctly. Any lining saturated with oil or grease must be replaced regardless of remaining thickness. OOS — contaminated
Rotor thickness — minimum thickness measurement
Measure rotor at the thinnest point of the swept area. Compare to the manufacturer minimum specification stamped on the rotor hat or recorded in the vehicle service manual. A rotor below minimum is OOS regardless of surface condition. Note any lateral runout above 0.003" — excessive runout causes pedal pulsation and accelerated pad wear. OOS — below min spec
Drum condition — cracking, heat checking, and scoring
Inspect drum inner surface for heat cracks, deep scoring, or hard spots. Any crack extending from the open face of the drum toward the back plate is OOS. Measure drum internal diameter — above maximum diameter is OOS regardless of surface appearance. Hard spots that appear as bright areas on the surface indicate overheating and require drum replacement. OOS — cracked drum
Caliper condition — slide pins, pistons, and dust boots
Check caliper slides for free movement — a seized slide causes uneven pad wear that destroys one pad while leaving the other near-new. Inspect piston dust boots for cracking or tearing — a compromised boot allows moisture into the piston bore, causing corrosion-induced seizure. Any caliper with a piston that will not retract fully requires rebuild or replacement. Defect — seized slide
Brake hardware — springs, pins, and retaining clips
Inspect all brake hardware at every lining replacement — return springs, hold-down springs, adjuster springs, and anti-rattle clips. Worn or missing hardware causes noise, vibration, and uneven lining wear. Reusing old hardware with new linings is a false economy — hardware costs $10–$20 per axle; a seized adjuster costs $400+. Defect — missing hardware
3. Slack Adjusters and ABS System Checklist
Slack adjusters are the most commonly defective individual brake component at DOT inspections — and automatic slack adjusters that are out of adjustment indicate a problem that the ASA itself cannot correct, requiring investigation of the underlying cause rather than manual adjustment. ABS malfunctions are increasingly cited as the inspection programme becomes more sophisticated. Track slack adjuster measurements and ABS fault history per vehicle with Oxmaint.
Automatic slack adjuster — stroke verification at 90 psi
Measure pushrod stroke with service brakes applied at 90 psi. An ASA that is out of adjustment indicates a defective adjuster, worn clevis pin, bent pushrod, or brake foundation problem — not a manual adjustment need. Never manually adjust an automatic slack adjuster as a corrective action; investigate and correct the root cause first. OOS — at readjustment limit
Slack adjuster condition — wear and mounting
Check slack adjuster for cracked housing, worn worm gear, and secure mounting to the brake camshaft. Any slack adjuster with visible housing damage must be replaced. Check clevis pin and clevis for wear — a worn clevis pin creates dead travel in the brake application that appears as excessive stroke on measurement. Defect — cracked housing
Manual slack adjusters — adjustment and condition
If manual slack adjusters are fitted, verify adjustment produces correct pushrod stroke. Check adjuster worm gear engagement — a worm gear that slips under load indicates internal wear requiring replacement. Lubricate adjuster grease points with appropriate grease per manufacturer specification — a dry adjuster seizes and loses self-adjustment capability. Defect — slip under load
ABS warning lamp — self-test and fault codes
Cycle ignition — ABS warning lamp must illuminate and extinguish on self-test. Any ABS fault code preventing the lamp from extinguishing is a defect requiring investigation. Scan all ABS wheel speed sensor circuits — a single intermittent sensor that does not trigger a permanent lamp fault can still cause ABS non-activation in an emergency stop. Defect — lamp stays on
ABS wheel speed sensors — gap and ring inspection
Measure air gap between each wheel speed sensor and tone ring — should be 0.020"–0.050" (varies by manufacturer). Check tone rings for missing, bent, or corroded teeth — a damaged tooth creates false ABS activation that destroys brake confidence on wet surfaces. Clean sensor faces and ring surfaces before measurement. Defect — incorrect gap
ABS modulator valves — function test and leak check
With scan tool connected, command each ABS modulator valve through apply, hold, and release cycles. Verify each valve responds correctly and returns to base position. Check valve bodies for air leaks at solenoid ports — a leaking modulator valve causes continuous small air loss that appears as a system leak of unknown location during hold tests. Defect — valve leak
Digital Twin tip: A vehicle's digital twin that tracks pushrod stroke measurements across successive inspections calculates wear rate per axle — predicting when each position will reach the OOS threshold and scheduling slack adjuster service 4–6 weeks before the limit is reached, eliminating reactive roadside discoveries. Book a demo to see predictive brake scheduling on Oxmaint.
4. Hydraulic Brakes and Parking Brake Checklist
Hydraulic brake systems are fitted to lighter commercial vehicles, vans, and pick-up trucks used in fleet operations. While hydraulic systems do not have the pushrod stroke measurement requirement of air brakes, they have their own failure modes — fluid contamination, master cylinder failure, and caliper seizure — that are equally capable of producing an OOS condition at roadside inspection.
Brake fluid level and moisture content
Check reservoir level — low fluid almost always indicates either a leak or worn linings that have caused pistons to extend and drawn fluid from the reservoir. Test moisture content with a brake fluid tester or test strips — fluid above 3% moisture must be flushed. Moisture-saturated fluid lowers boiling point by up to 50°F, increasing fade risk under repeated hard stops. Defect — low level
Pedal travel and firmness — static and dynamic test
Apply pedal with steady force — pedal must be firm and must not travel more than 50% of available stroke before firm resistance is felt. A spongy pedal indicates air in the hydraulic circuit. A pedal that slowly sinks under constant pressure indicates a master cylinder internal bypass — the vehicle must not be dispatched until the master cylinder is replaced. OOS — sinking pedal
Brake lines and flexible hoses — full system inspection
Inspect all steel brake lines for corrosion, kinking, and mechanical damage. Check all flexible rubber hoses for swelling, cracking, and chafing. A hydraulic brake hose that swells under pressure acts as an accumulator — absorbing pedal travel and reducing braking force. Any swollen, cracked, or damaged hose is a direct replacement requirement. OOS — swollen hose
Brake booster — vacuum or hydraulic assist check
With engine off, pump pedal to exhaust vacuum reserve. Apply steady pressure and start engine — pedal must drop noticeably as boost is restored. A booster that provides no assist significantly increases stopping distance on heavy vehicles. Check power brake booster check valve — a failed check valve causes boost loss on engine shut-off before the vehicle is fully stopped. Defect — no assist
Parking brake — hold test on grade or roller brake tester
Apply parking brake and attempt to move vehicle under power in low gear. Parking brake must hold the vehicle stationary. For roller brake testing, parking brake efficiency must meet the minimum percentage for the vehicle class. A parking brake that cannot hold on a gradient or produce adequate roller brake test efficiency is OOS and a direct runaway risk. OOS — fails hold test
Parking brake cable, linkage, and mechanism
Inspect parking brake cable for fraying, kinking, or seized inner wire. Check equaliser bar for correct operation — an uneven equaliser causes one-sided parking brake application that generates pulling under load and uneven rear brake wear. Lubricate all pivot points per manufacturer specification. A stretched cable that prevents full mechanical engagement is a defect requiring adjustment or replacement. Defect — frayed cable
We had three OOS brake events at roadside in one quarter — all pushrod stroke violations that our paper inspections had missed because nobody was recording actual stroke measurements. After deploying Oxmaint's brake inspection module, every chamber is measured and logged at every PM. We haven't had a brake OOS in 18 months.
Brake Inspection Compliance — Key Metrics
Brake violations account for 34% of all CMV out-of-service orders — making brake PM the highest-ROI compliance investment in any fleet operation.
AI camera brake measurement reduces per-vehicle inspection time by up to 40% on multi-axle vehicles — freeing technician time for corrective work rather than measurement tasks.
Digital twin wear rate modelling gives brake technicians 6–8 weeks of advance notice before any axle position reaches the OOS threshold — eliminating reactive discoveries.
Average total cost per preventable brake-related crash in commercial vehicle operations — against which every brake inspection investment must be measured.
Frequently Asked Questions
The most common questions from brake technicians and fleet managers about brake inspection standards, OOS criteria, and maintenance intervals.
1/4" or less on non-steering axle disc brakes; 1/8" or less on steering axle disc brakes; 2mm or less on drum brake linings. These are the federal OOS thresholds — many carriers use higher replacement triggers (e.g., 3/8" non-steer) to prevent approaching the OOS limit between inspections.
An ASA that is out of adjustment indicates an underlying fault — worn clevis, bent pushrod, defective adjuster mechanism, or brake foundation problem — that the ASA cannot compensate for. Manually adjusting it without fixing the cause will result in the same over-stroke condition within miles, and the underlying fault may be structurally dangerous.
At minimum every 15,000 miles or 6 months — whichever comes first. High-utilisation vehicles, mountain route operations, and vehicles operating at or near maximum GVW should inspect brake linings every 10,000 miles and measure pushrod stroke at every PM event regardless of mileage interval.
A failed hold test (pressure loss above the FMCSA limit) means there is an active air leak in the system. The vehicle must not be dispatched until the leak source is identified and repaired. Common sources: glad hand seals, pushrod boot seals, delivery valve seats, brake chamber diaphragms, and push-to-connect fitting o-rings.
Yes. Oxmaint records lining thickness measurements per axle and wheel position at every inspection, calculates wear rate from successive measurements, and projects the date each position will reach the replacement trigger — displaying fleet-wide brake condition on a single dashboard that maintenance managers can review without pulling individual vehicle records.
Inspection measures and documents the current condition of every brake component against acceptance standards. Maintenance is the corrective and preventive work — lining replacement, adjustment, lubrication, fluid flush — that keeps components within those standards. This checklist covers both: inspection items identify what needs attention; maintenance items ensure the corrective work is completed and documented.


.png)