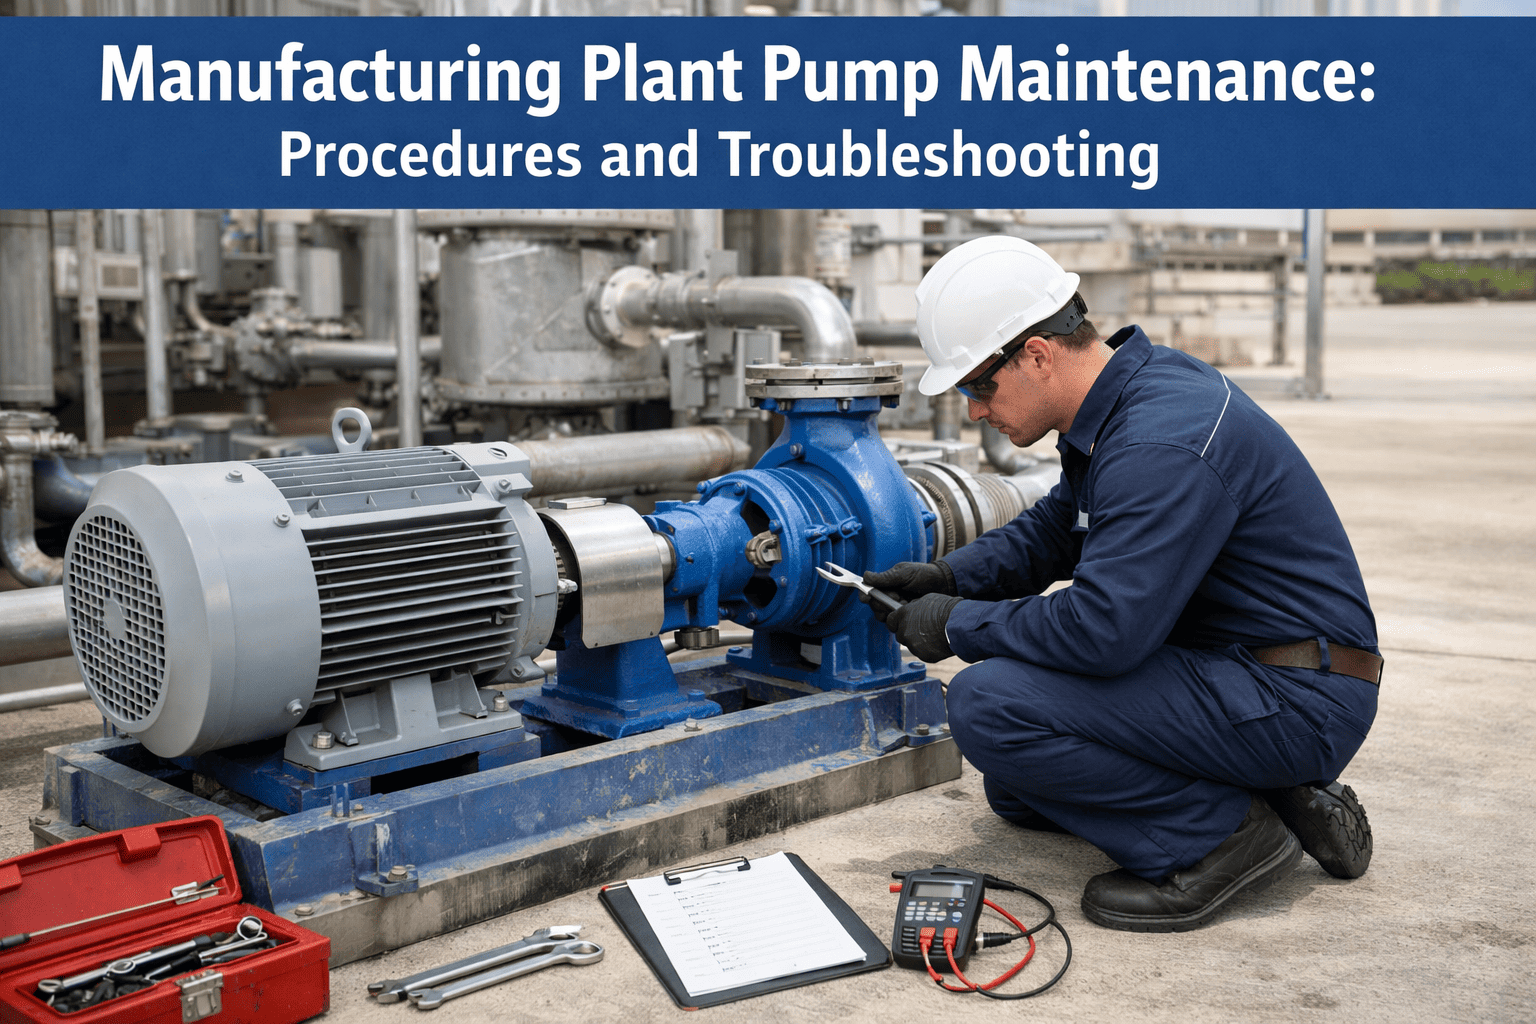
Every manufacturing facility depends on pumps to move fluids through cooling loops, chemical processes, hydraulic systems, and wastewater lines. When a single pump fails without warning, the ripple effect is immediate — production stops, emergency repair costs spike, and downstream equipment sits idle. Yet most plants still treat pump care as an afterthought, reacting to breakdowns instead of preventing them. This guide breaks down the field-tested inspection routines, lubrication protocols, alignment techniques, and diagnostic methods that keep industrial pumps running at peak reliability. If your team is ready to move beyond spreadsheets and paper logs, sign up for Oxmaint's maintenance management platform to get the digital backbone that schedules every task, tracks every reading, and catches every warning sign before it becomes a production-stopping failure.
How Pump Downtime Impacts Manufacturing Output
Pumps are classified as critical rotating equipment in most manufacturing risk assessments, and for good reason. A single unplanned pump stoppage can cascade through interconnected systems, idling entire production trains and forcing emergency measures that cost several times more than planned repairs.
$50B+
Annual unplanned downtime cost across manufacturing — pump failures rank among the leading causes
60%
Of all pump failures originate from just three root causes: seal leaks, bearing wear, and cavitation damage
3-5x
Cost multiplier for emergency pump repairs compared to the same work performed during planned maintenance windows
These numbers make one thing clear: every dollar invested in structured pump maintenance returns multiples in avoided downtime, preserved production, and extended equipment life. Plants that shift from reactive to preventive strategies consistently report fewer emergency stops and lower total maintenance spending. Sign up for Oxmaint to start building scheduled pump maintenance routines that eliminate costly surprises.
Daily, Weekly, and Monthly Pump Inspection Routines
Reliable pump performance is built on layered inspection routines. Each frequency tier catches different failure modes at different stages of development, creating overlapping safety nets that dramatically reduce the chance of a surprise breakdown reaching the shop floor.
Daily Walkthrough
Visually scan pump casing, flanges, and pipe connections for active leaks or moisture accumulation
Listen for abnormal sounds — grinding suggests bearing distress, popping indicates cavitation
Read suction and discharge pressure gauges and compare against baseline operating range
Touch-check motor housing temperature — excessive heat may signal electrical or loading issues
Verify foundation bolts are secure and no visible vibration displacement has occurred
Weekly Performance Check
Log flow rate, differential pressure, and motor amperage for trend tracking
Measure bearing temperature using infrared thermometer or contact probe
Inspect suction strainers and inline filters — clean or replace if pressure drop increases
Verify oil sight glass level on lubricated bearings; top off if below the midpoint mark
Check coupling guards and all safety covers for secure attachment
Monthly Deep Inspection
Collect vibration spectrum data on all pump and motor bearing positions
Inspect mechanical seal flush system for adequate flow and correct temperature
Verify pump-to-motor shaft alignment using dial indicator or laser alignment tool
Perform motor insulation resistance test (megger test) to detect winding degradation
Clean motor ventilation openings and inspect windings for dust or moisture ingress
Annual Overhaul
Fully disassemble pump — inspect impeller vanes, wear rings, volute, and shaft surfaces
Replace all seals, O-rings, gaskets, and bearings regardless of apparent condition
Measure wear ring clearance and shaft runout (replace if runout exceeds 0.002 inches)
Benchmark performance: record head pressure, flow rate, motor amps, and vibration
Update asset records, attach inspection photos, and adjust PM intervals based on findings
Digitize every checklist. Oxmaint auto-generates work orders on schedule, pushes them to your technicians' phones, and logs every reading — so no inspection ever falls through the cracks.
Mechanical Seal Inspection: Preventing the #1 Pump Failure
Mechanical seal failure is the single most common reason pumps are pulled from service in manufacturing environments. Seals operate at the boundary between the rotating shaft and the stationary pump housing, under constant exposure to pressure, heat, chemical attack, and abrasive particles. Catching seal degradation early is the highest-impact inspection you can perform.
Seal Face Condition
Inspect both rotating and stationary faces for scoring, heat checking, or chipping. Even hairline surface defects create leakage paths that accelerate under operating pressure. Replace both faces as a set if either shows damage.
Flush System Integrity
Verify that seal flush piping is clear, flow rate is within specification, and flush fluid temperature stays below the seal's thermal limit. A blocked flush line is a leading cause of sudden seal failure in chemical and process plants.
Elastomer Degradation
Check O-rings and secondary seals for swelling, hardening, or cracking. Avoid petroleum-based lubricants on elastomers — they cause swelling that leads to premature failure. Use manufacturer-approved assembly lubricants only.
Leakage Rate Trending
Track seal drip rate over time. A gradual increase signals progressive wear allowing planned replacement on your terms. A sudden spike means immediate damage — shut down and inspect before the shaft or bearings are compromised.
Bearing Lubrication and Impeller Care Best Practices
Bearings and impellers form the mechanical heart of every pump. Bearing failures from improper lubrication are among the most preventable causes of unplanned downtime, while impeller wear quietly erodes pump efficiency and increases energy consumption over time. Getting both right is essential to long-term pump health.
Match the lubricant exactly — use only the type, grade, and quantity specified in the OEM manual. More bearing damage occurs from over-greasing than from under-greasing.
Grease-lubricated bearings: re-grease every 2,000 operating hours or 3 months (whichever comes first). After greasing, remove the vent cap and run the pump for 30 minutes to purge excess.
Oil-lubricated bearings: change oil after the first 200 hours on new pumps, then every 2,000 hours or quarterly. Use non-foaming, non-detergent oils and fill to the sight glass midpoint.
Never mix grease types — different base stocks (lithium, polyurea, etc.) can react and lose their lubricating properties, accelerating bearing failure.
Monitor bearing sound and heat with a stethoscope and infrared thermometer during routine rounds. Grinding or elevated temperature warrants immediate investigation.
Examine vane surfaces for erosion pitting, cavitation damage, and corrosion during every scheduled overhaul. Document findings with close-up photos.
Measure wear ring clearance — when clearance exceeds OEM tolerance, pump recirculation increases, efficiency drops, and vibration rises. Replace worn rings promptly.
Check impeller balance — even minor mass imbalance creates vibration forces that accelerate bearing and seal degradation throughout the pump assembly.
Verify impeller-to-casing gap after any reassembly. Incorrect spacing reduces head pressure and can cause contact damage at higher operating speeds.
Compare performance to baseline — if the same pump produces less flow or head than its original benchmark at the same speed, impeller wear is the likely cause.
Never miss a lubrication interval again. Oxmaint tracks operating hours, triggers PM work orders automatically, and keeps a complete service history for every pump in your plant — so bearing failures from skipped greasing become a thing of the past.
Using Vibration Analysis to Predict Pump Failures
Vibration monitoring is the most effective predictive maintenance tool available for rotating pump equipment. Different vibration signatures correspond to specific mechanical faults, allowing trained technicians to identify problems weeks or months before they progress to catastrophic failure. Establishing baselines early in pump life and trending changes over time turns raw vibration data into actionable maintenance intelligence.
Troubleshooting the 6 Most Common Pump Problems
When a manufacturing pump starts showing symptoms — reduced flow, unusual noise, overheating, or visible leakage — fast and accurate diagnosis prevents minor issues from snowballing into major production losses. Here are the problems maintenance teams encounter most often, along with the root causes and corrective steps that resolve them.
01
No Flow or Insufficient Discharge
Pump runs but delivers little or no liquid to the process
Check that the pump is fully primed and the suction line has no air leaks. Verify suction and discharge valves are correctly positioned. Inspect the impeller for clogging, and confirm the pump is operating within its designed speed range.
02
Cavitation Damage and Noise
Crackling or gravel-like sound near the impeller; pitting on vane surfaces
Cavitation occurs when suction pressure drops below the fluid's vapor pressure. Verify that Net Positive Suction Head (NPSH) available exceeds the pump's requirement. Clean suction strainers, open suction valves fully, and reduce suction line losses.
03
Excessive Vibration and Loosening Hardware
Visible shaking, bolt loosening, elevated vibration readings
Perform a precision shaft alignment check (laser preferred). Inspect bearings for wear and replace if defect frequencies are present. Verify impeller balance and baseplate integrity. Tighten all foundation and hold-down bolts to specification.
04
Seal Leakage at the Shaft
Fluid dripping or spraying from the seal area during operation
Inspect seal faces for scoring or thermal damage. Check shaft runout — excessive runout destroys seals rapidly. Verify the seal flush system is operational and the correct seal material is installed for the fluid being pumped.
05
Low Discharge Pressure Despite Normal Flow
Pump moves fluid but cannot develop the required head pressure
Inspect for worn impeller vanes or excessive wear ring clearance allowing internal recirculation. Verify motor speed is correct (check VFD output or belt tension). Confirm the pump curve matches the actual system requirements.
06
Motor Overheating or Frequent Tripping
Motor trips on thermal overload or draws excessive amperage
Check for mechanical binding — seized bearings, packing too tight, or foreign objects in the impeller. Verify the pumped fluid's specific gravity matches design. Ensure the pump is operating near its Best Efficiency Point (BEP) and not at extreme ends of the curve.
Every troubleshooting event should be logged with the symptom observed, root cause identified, corrective action taken, and parts consumed. Over time, this data reveals which pumps are chronic underperformers and where your preventive maintenance program needs adjustment. Sign up for Oxmaint to start capturing this data digitally — technicians log everything on their mobile device as they work, building a searchable failure history that drives smarter decisions.
Why Preventive Beats Reactive: The Maintenance Cost Equation
The financial case for structured pump maintenance is overwhelming. Reactive maintenance costs more per incident, takes longer to execute, creates secondary damage to connected equipment, and generates off-specification product that may need to be scrapped. Here is what the data consistently shows across manufacturing sectors.
Reactive Approach
Repairs only happen after pump breaks down
Emergency parts at rush-order premiums
Unplanned production shutdowns
No historical data for failure trend analysis
Safety risks from catastrophic in-service failures
$172M
Average annual downtime cost per large plant
VS
Preventive + Predictive (CMMS-Driven)
Scheduled inspections catch issues early
Spare parts stocked based on predicted needs
Maintenance during planned low-production windows
Data-driven reliability improvement cycle
Controlled conditions reduce worker injury risk
36%
Reduction in downtime with predictive strategies
Matching Maintenance Procedures to Pump Type
Manufacturing plants typically operate multiple pump types, each with different wear patterns, failure modes, and inspection priorities. Applying the right maintenance focus to each pump type is critical — a procedure designed for centrifugal pumps will miss the key failure points of a diaphragm or gear pump entirely.
Managing a mixed pump fleet? Oxmaint lets you configure unique PM schedules, checklists, and spare parts lists for each pump type — all organized by asset, location, and criticality level.
How a CMMS Transforms Pump Reliability Programs
A Computerized Maintenance Management System replaces scattered paper logs, tribal knowledge, and forgotten inspection dates with a connected digital workflow. For pump maintenance specifically, a CMMS like Oxmaint closes the gaps that allow preventable failures to slip through.
01
Register Every Pump Asset
Catalog each pump with its model, serial number, location, OEM specs, and performance curves. Attach nameplate photos for instant field reference.
02
Automate PM Scheduling
Set tasks by calendar interval or running hours. Oxmaint auto-generates work orders and pushes them to the right technician's mobile device on time.
03
Execute and Log in the Field
Technicians complete digital checklists, record pressure and vibration readings, attach photos, and close work orders — all from their phone on the plant floor.
04
Track Parts and Inventory
Link spare seals, bearings, and impellers to specific assets. Receive automatic alerts when stock drops below reorder thresholds — no more emergency procurement.
05
Analyze and Improve Continuously
Dashboard analytics reveal MTBF, MTTR, failure trends, and cost per asset — data that drives smarter maintenance intervals and capital replacement decisions.
Stop Reacting. Start Preventing.
Your manufacturing pumps deserve a maintenance program that catches problems early, keeps parts in stock, and puts actionable data in your team's hands. Oxmaint brings every pump, every procedure, and every data point together — giving you the visibility to keep production running without interruption.
Frequently Asked Questions
What is the recommended maintenance frequency for industrial pumps?
A proven baseline includes daily visual walkthrough inspections, weekly operational performance checks (pressures, temperatures, flow), monthly vibration analysis and seal inspections, and a full annual overhaul with component replacement. High-criticality or continuous-duty pumps often need more frequent monitoring.
Sign up for Oxmaint to configure custom schedules matched to each pump's duty cycle and operating environment.
What causes most pump failures in manufacturing plants?
Seal leakage, bearing wear, and cavitation are responsible for over 60% of pump failures. Other frequent causes include shaft misalignment, impeller erosion, operating far from the Best Efficiency Point, and dry running. The majority of these are preventable through structured inspection routines, proper lubrication practices, and real-time condition monitoring.
How does a CMMS improve pump maintenance outcomes?
A CMMS automates the scheduling of preventive tasks, assigns work orders to technicians, tracks spare parts inventory, and provides analytics on equipment reliability. It replaces manual tracking with a digital system that ensures every task is completed on time and every finding is recorded.
Book a demo to see how Oxmaint manages pump maintenance for manufacturing facilities of all sizes.
What is cavitation and how can it be prevented?
Cavitation happens when the fluid pressure at the pump inlet falls below the liquid's vapor pressure, causing vapor bubbles to form and violently collapse against internal surfaces. It sounds like gravel running through the pump and causes rapid erosion of the impeller. Prevention requires maintaining adequate Net Positive Suction Head (NPSH), keeping suction strainers clean, minimizing suction line friction losses, and ensuring the pump operates within its designed flow range.
How can I reduce emergency pump repair costs?
Shift from reactive to preventive and predictive maintenance. Scheduled inspections catch problems when repairs are simple and inexpensive. Stock critical spares to avoid rush-order premiums. Use vibration analysis and thermal imaging to detect degradation before failure. A CMMS coordinates all of these activities, creating a single manageable workflow that drives down emergency spend.
Sign up for Oxmaint to start building your preventive program today.