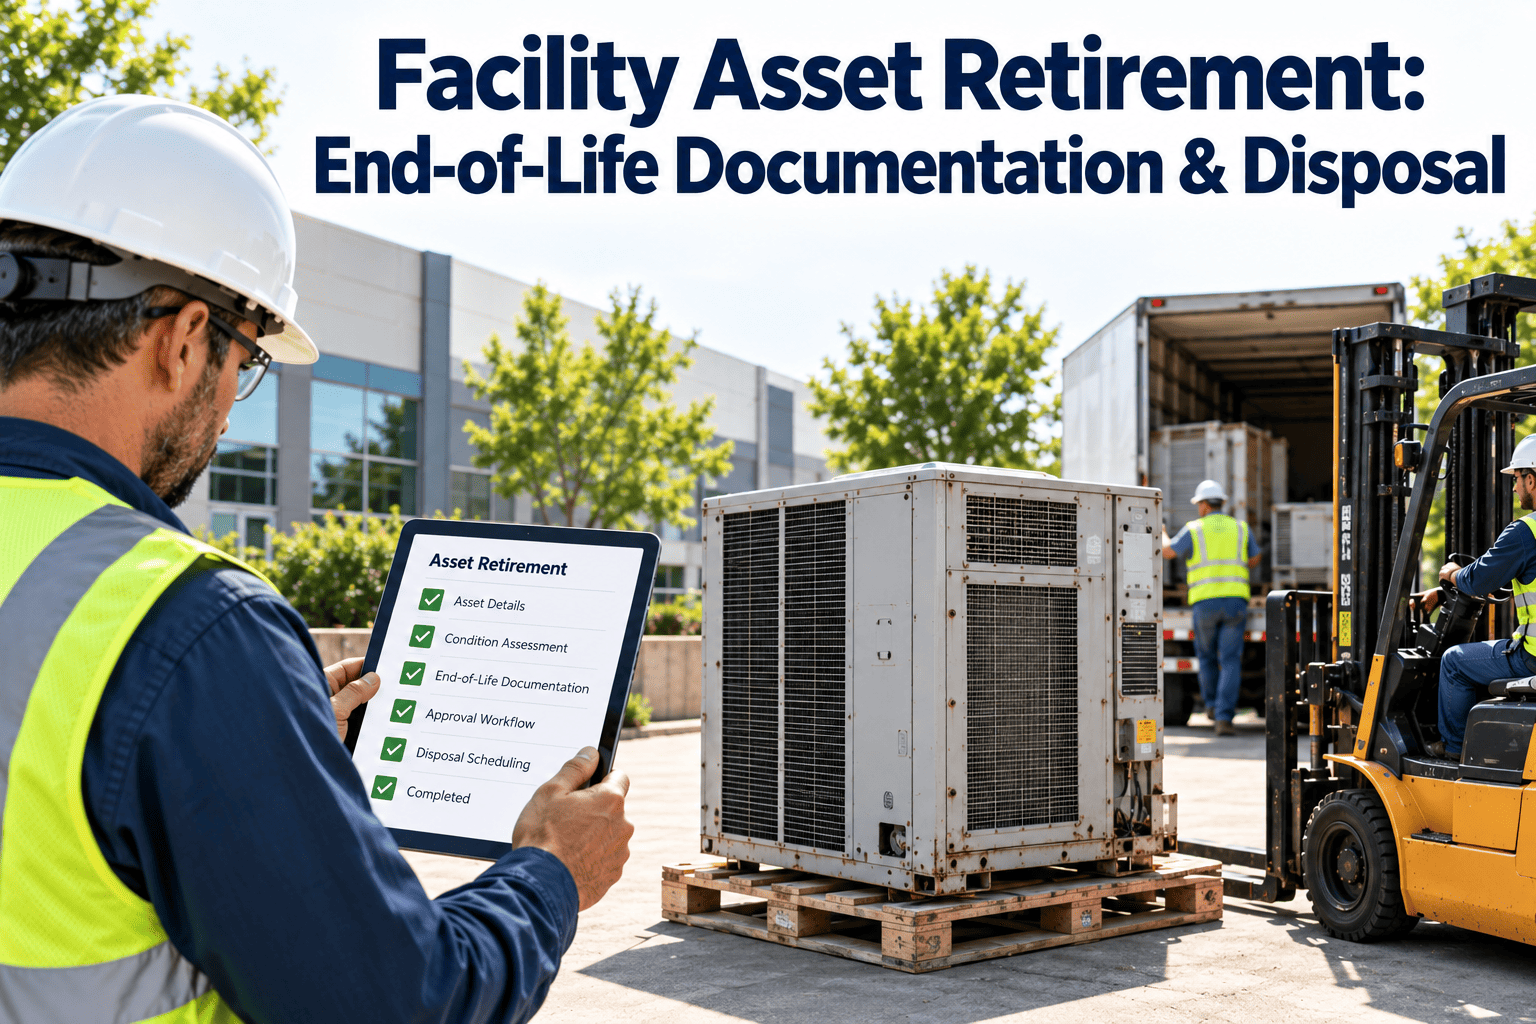
Every facility has a plan for buying equipment and a routine for maintaining it, but the final stage of the asset lifecycle is often handled by a phone call to a scrap hauler. Retirement is where refrigerant has to be recovered, hazardous components separated, warranty and capital records closed, and decades of maintenance history either preserved or lost. This guide lays out the end-of-life documentation, disposal compliance steps, and archival workflow that keep retirement defensible. Facilities that already track assets and work orders in Oxmaint asset management software can add retirement as a controlled workflow instead of an afterthought.
The lifecycle stage everyone forgets: retire assets with a record, not a handshake
End-of-life documentation, disposal compliance, and CMMS archival for commercial facilities. Close out each asset with evidence for auditors, finance, insurers, and the next capital plan.
Why retirement is the weakest link in facility asset records
Asset management standards treat disposal as a full lifecycle stage. ISO 55001 describes the lifecycle from identifying the need for an asset through decommissioning and disposal, and the Institute of Asset Management publishes dedicated guidance on decommissioning and disposal decisions. In practice, many teams stop documenting the moment a unit fails.
The retirement lifecycle in seven controlled steps
Treat retirement like a work order type with its own approvals. Each step has a clear output, so the record builds as the work happens.
- 1Trigger and reviewA retirement review starts from a trigger such as repeated failures, a repair cost near replacement value, obsolescence, safety risk, or a capital project.
- 2ApprovalMaintenance, finance, and the asset owner sign off, with the reason recorded against the asset.
- 3Isolation and decommissioningEnergy sources are isolated, fluids drained or recovered, and the unit made safe under lockout procedures.
- 4Salvage and parts harvestUsable motors, controls, and spares are tagged, inspected, and moved into inventory.
- 5Disposal or transferRemaining material is recycled, sold, donated, or removed by a qualified contractor with documentation.
- 6Records closeoutCertificates, photos, and final cost are attached, and the asset status is changed to retired.
- 7Lessons feed the planActual service life and cost per year of service update replacement forecasts.
Step 1: decide whether to retire, repair, or extend life
A retirement review should be driven by evidence from the asset record rather than by the loudest complaint. These signals are worth gathering before approval.
Use the matrix as a discussion tool. A single strong signal such as a safety issue can outweigh everything else, and a well-documented repair history makes the final decision much easier to defend.
Step 3 and 5: disposal compliance checkpoints by equipment type
Requirements vary by country, state, and municipality, so confirm local rules with your environmental or legal contact. The table lists common checkpoints that appear in US commercial facilities.
| Equipment type | Common concern | Checkpoint before it leaves site | Record to keep |
|---|---|---|---|
| Chillers, air conditioners, refrigeration | Refrigerants regulated under the Clean Air Act | Refrigerant recovered by a certified technician before disassembly | Recovery log, technician certification, quantity recovered |
| Fluorescent and HID lamps | Mercury content | Segregated as universal waste or handled under local rules | Recycler manifest or receipt |
| Batteries, UPS units, emergency lighting | Lead, lithium, and other regulated content | Terminals protected and units sent to a battery recycler | Recycler receipt and count |
| Older ballasts, capacitors, transformers | Possible legacy PCB content in very old units | Labels checked and suspect items tested before disposal | Test result or disposal certificate |
| Boilers, piping, insulated equipment | Possible asbestos in older insulation or gaskets | Survey results reviewed before removal work | Survey report and abatement paperwork where required |
| Controls, BMS panels, IT hardware | Electronic waste and stored data | Data cleared and e-waste routed to a certified recycler | Data-clearing note and recycler certificate |
| Oils, glycol, water treatment chemicals | Contaminated fluids and spill risk | Drained into approved containers and labeled | Waste manifest and hauler details |
The end-of-life documentation packet
One packet per retired asset keeps answers close at hand when finance, auditors, or insurers ask what happened. Attach each item to the asset record rather than storing it on a shared drive.
Identity and approval
- Asset ID, location, model, and serial number
- Install date and age at retirement
- Retirement reason and decision notes
- Approver names and approval dates
Condition and history
- Final condition assessment with photos
- Total repair count and cost across life
- Last PM and inspection records
- Warranty status and any open claims
Disposal evidence
- Refrigerant recovery or fluid drain log
- Hazardous material handling records
- Contractor name, date, and receipt
- Recycling or scrap certificate
Financial closeout
- Book value or write-off reference
- Salvage or sale proceeds
- Cost of removal and disposal
- Replacement asset link and capital project
Close out your next retired asset with a complete record
Create a retirement workflow with approvals, disposal documents, and archived history inside your maintenance platform.
Who asks for retirement records, and what they want to see
Retirement evidence is rarely requested on the day of disposal. It is requested months later, by someone with a different question. Building the packet around those readers saves a scramble.
Auditors
They test whether retirement followed an approved process and whether the asset register matches what physically exists on site.
Finance
They need the retirement date, book value, proceeds, and removal cost to close the fixed asset entry correctly.
Insurers
They compare the insured equipment schedule with what is installed, and may ask for proof that failed equipment was removed.
Regulators and landlords
They may ask for refrigerant, waste, or hazardous material records, or for evidence that leased premises were left in the agreed condition.
Capital planners
They want real service life and lifetime cost, so the next replacement forecast is built on facility data rather than catalog figures.
Retirement signals by building system
Every system fails differently, so the evidence that supports retirement differs too. Use these prompts to decide what to check in the asset history before you approve a retirement.
| Building system | History to review | Retirement-specific risk |
|---|---|---|
| HVAC and refrigeration | Leak repairs, compressor failures, efficiency drift, refrigerant top-ups | Refrigerant recovery and the supply of compatible refrigerant for the remaining life |
| Electrical distribution | Thermography findings, breaker trips, load growth, inspection results | Isolation, arc-flash safety, and labeling of any dead feeders left in place |
| Plumbing and boilers | Leaks, corrosion findings, water treatment records, safety valve tests | Draining, insulation survey, and flue or gas line capping |
| Fire and life safety | Inspection deficiencies, failed tests, impairments | Code authority notification and impairment management while the system is out of service |
| Vertical transportation | Callbacks, entrapments, controller obsolescence, inspection results | Permits, inspections, and contractor documentation required before the replacement enters service |
| Roofing and envelope | Leak history, moisture surveys, repair patches, warranty status | Warranty transfer and disposal of old membrane or insulation under local rules |
Salvage and parts harvest: what to keep before disposal
Retiring a unit is a chance to recover value, but only when someone decides what to keep before the contractor arrives. Record each harvested part as inventory so it can be found later.
Keep as spares
- Motors, drives, and contactors that match other equipment
- Pumps, valves, and controls still within useful life
- Specialty fasteners, belts, and bearings that are hard to source
Sell or transfer
- Complete units that run and have a resale market
- Copper, steel, and aluminum sold as scrap with a receipt
- Equipment moved to another site under a recorded transfer
Dispose of properly
- Anything with regulated fluids, lamps, batteries, or electronics
- Insulation or materials that need a hazard survey
- Parts with safety concerns or unknown condition
Tag harvested parts with the source asset ID. If a salvaged motor later fails, the original asset history tells you how many hours it already ran.
An illustrative retirement record
The example below is a hypothetical air handling unit, shown to illustrate how the record builds across the lifecycle. The values are examples only.
Pre-removal checklist for the technician in charge
Run this list on the day of removal. Each line takes a minute, and together they prevent the most common gaps in the disposal record.
- Confirm the asset ID on the tag matches the retirement work order before anything is disconnected.
- Verify lockout and isolation of electrical, gas, water, and control connections, and photograph the isolation points.
- Check for refrigerant, oil, glycol, or process fluid, and confirm who is recovering or draining each one.
- Note any labels warning of legacy materials, and stop work to arrange a survey if the content is uncertain.
- Mark parts to be harvested with the source asset ID before the contractor starts cutting.
- Ask the contractor for a signed receipt that lists the unit, the date, and the material streams.
- Photograph the empty location, including any capped lines or abandoned supports left behind.
Retirement mistakes that create audit and cost problems
- Retiring equipment physically but leaving the asset active, so PMs, insurance schedules, and depreciation keep running.
- Letting a demolition or scrap contractor remove equipment without refrigerant recovery or fluid drain documentation.
- Deleting the CMMS record, which removes the evidence needed to defend the replacement decision.
- Skipping a review of the shared spares that supported the retired model.
- Failing to record the replacement link, which breaks the chain of history between old and new equipment.
- Waiting until a year-end audit to reconcile the register with the field.
CMMS archival: keep the history, retire the active tasks
Deleting a retired asset erases evidence. Marking it retired while keeping its history gives you a reference for future replacement decisions.
Typical handling today
- Asset record deleted or left active
- PM tasks keep generating for removed equipment
- Disposal papers sit in an email folder
- Spares for the old model stay on the shelf
- Replacement budget built from guesswork
Controlled retirement
- Status changed to retired, history preserved
- Open PMs and work orders closed with a reason
- Disposal documents attached to the asset
- Spares reviewed and reassigned or written off
- Actual life and cost feed the capital forecast
What to do in the CMMS at retirement
- Close or cancel open work orders with a retirement reason.
- Deactivate recurring preventive maintenance schedules for the asset.
- Attach the documentation packet and disposal certificates.
- Set the asset status to retired and record the retirement date.
- Link the replacement asset so history stays traceable.
- Review inventory linked to the old model and update reorder points.
Retirement KPIs worth tracking
These measures turn retirement from a hidden cost into a managed process. Calculate them from the asset records you already hold.
Who owns what during retirement
| Role | Responsibility | Evidence they provide |
|---|---|---|
| Maintenance manager | Condition review and retirement recommendation | Repair history and condition report |
| Technician or contractor | Isolation, refrigerant recovery, safe removal | Recovery log and removal photos |
| Environmental or safety lead | Hazardous material routing and compliance review | Waste manifests and survey records |
| Finance or controller | Write-off, salvage, and capital accounting | Disposal journal and book value record |
| Planner | Closes tasks, updates inventory, links replacement | CMMS status change and audit trail |
Asset retirement questions from facility teams
Should retired assets be deleted from the CMMS?
No. Mark them retired and keep the history so future replacement decisions use real service life and repair cost data.
What documents prove proper disposal?
Recovery logs, waste manifests, recycler certificates, and contractor receipts, attached to the asset. You can store them in Oxmaint against each record.
When is retirement better than another repair?
When repeated failures, rising repair cost, unavailable parts, or safety issues outweigh the value of extending life. Use the signal matrix.
What happens to PM tasks for a retired asset?
Deactivate them at retirement so planners stop scheduling work. Book a demo to see the retirement workflow.
Does retirement connect to capital planning?
Yes. Actual service life and total cost per year at retirement make replacement forecasts more reliable than manufacturer estimates alone.
Give every retired asset a finished record
Set up retirement approvals, disposal documentation, and archived history in one place, or review your lifecycle process with a specialist.