A tire that fails early is not just a replacement cost. It is a road call, a lost trip, a driver waiting on the shoulder, and sometimes a claim that never gets filed because the paperwork was never kept. Most fleets own more warranty value than they ever recover, simply because evidence is scattered across tickets, photos, and texts. This article lays out a practical tire warranty claim workflow, from the first inspection note to the credit memo, and shows how fleet maintenance software keeps the proof attached to each tire and unit.
Tires and Wheels
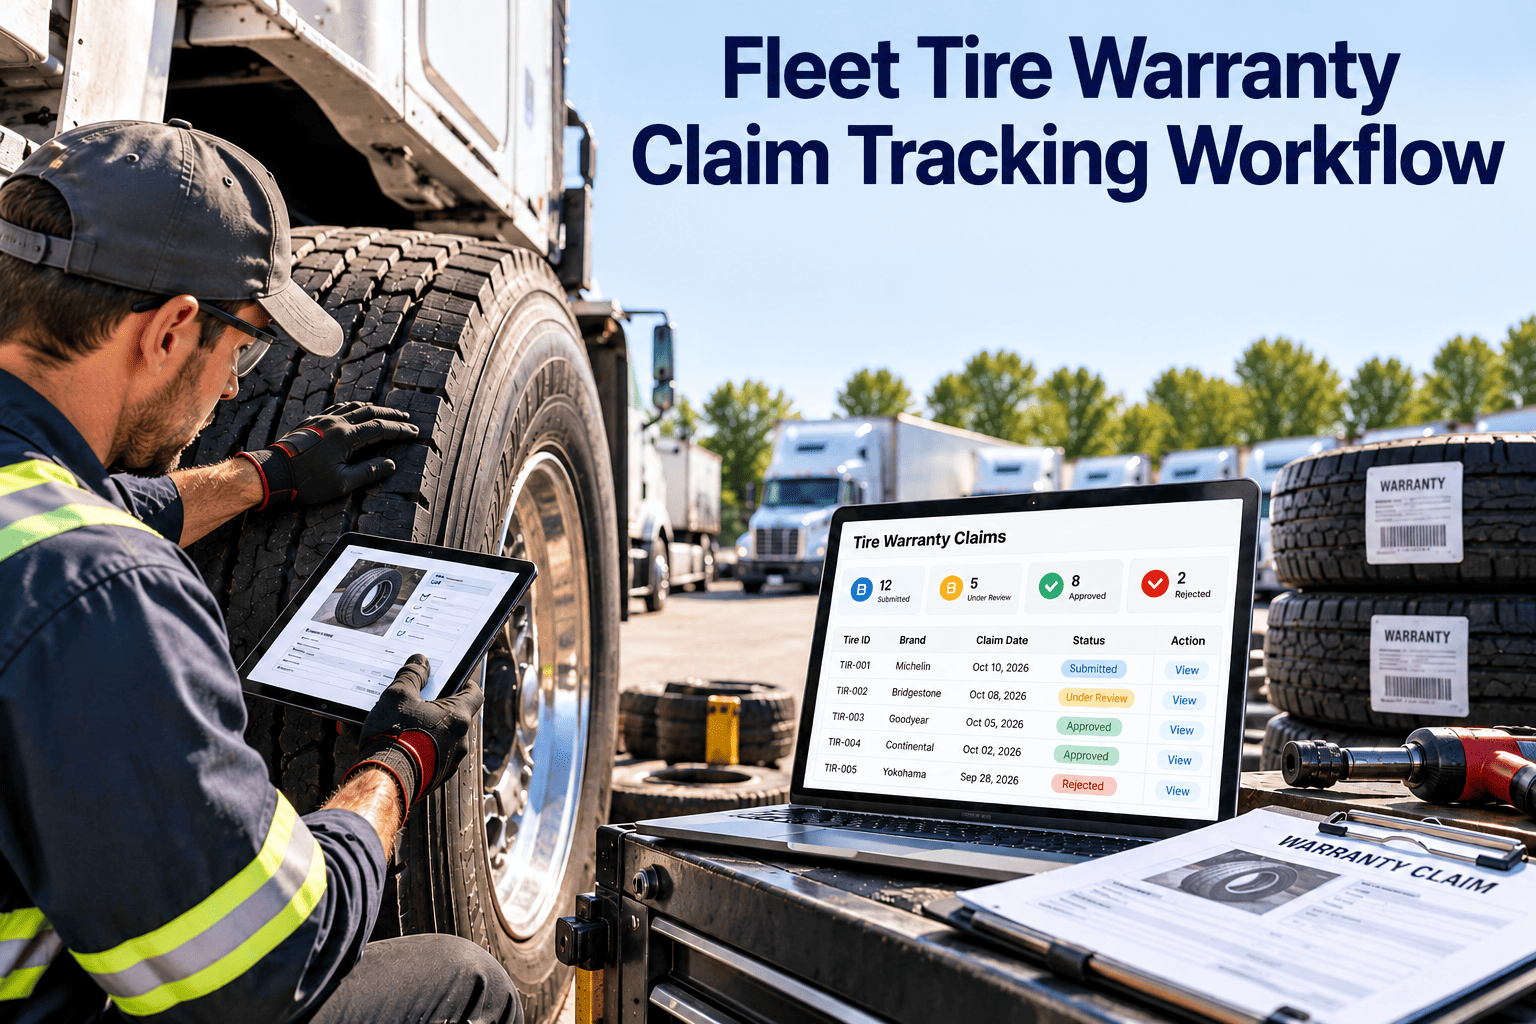
Fleet Tire Warranty Claim Tracking Workflow
Turn premature tire failures into recovered credits. Capture evidence at the moment of failure, track every claim to closure, and stop letting warranty windows expire.
01
Detect
02
Document
03
Submit
04
Adjudicate
05
Credit
Why Fleets Leave Tire Warranty Money Unclaimed
No tire-level identity
Tires are tracked by unit, not by serial number or DOT code, so nobody can prove which tire failed or how old it was.
Evidence is lost
Photos live on a driver phone, tread readings live on paper, and the failed tire is scrapped before anyone inspects it.
Deadlines are invisible
Claim windows, tread-depth rules, and return requirements differ by manufacturer, and nobody owns the calendar.
Cause is guessed
Without pressure and inspection history, a manufacturing defect cannot be separated from damage or neglect.
Know What Is and Is Not Normally Covered
Coverage terms differ by manufacturer, tire line, and purchase agreement. Always read the actual warranty document, and treat the table below as a way to sort failures before you file, not as a coverage guarantee.
| Failure observed | Often reviewed as | Evidence that helps the claim |
|---|---|---|
| Belt edge separation, ply separation | Workmanship or materials | Photos of the casing, DOT code, mileage, inspection history |
| Premature or irregular tread wear | Wear adjustment, sometimes alignment related | Tread depth readings over time, alignment records |
| Sidewall bulge or bubble | Possible defect or impact damage | Close photos, location on the tire, incident notes |
| Puncture or cut | Road hazard, usually separate coverage | Repair record, vendor road hazard terms |
| Underinflation damage | Typically excluded | Pressure checks showing the tire was maintained |
| Retread failure | Retreader casing or process warranty | Retread ticket, casing history, retreader contact |
The Claim Workflow by Role
Driver or inspector
Flags the tire during a pre-trip or walkaround, records position and symptoms, and takes photos before the unit leaves service.
Technician
Measures tread depth, pressure, and checks alignment signs. Tags the removed tire, preserves it, and records the DOT code on the work order.
Parts or tire coordinator
Confirms purchase date, warranty terms, and deadline. Builds the claim packet and submits it to the dealer or manufacturer.
Vendor or manufacturer
Inspects the tire, issues an approval, a pro-rated adjustment, or a denial with reasons.
Finance
Matches the credit memo to the claim and the original invoice, then posts the recovery to the unit cost record.
The Claim Packet: What to Capture Every Time
1Tire serial and DOT code, brand, model, and size
2Unit, axle position, and install date and odometer
3Removal date, odometer, and reason for removal
4Tread depth readings across the tire face
5Inflation and inspection history for that position
6Photos of tread, both sidewalls, and the failure area
7Original purchase invoice and warranty terms
8Tagged physical tire stored until the claim closes
Before and After the Workflow Is in Place
Informal handling
- Failed tire is scrapped at the shop
- Claim depends on one person remembering
- Vendor asks for records no one can find
- Credits arrive late, partial, or never
Tracked workflow
- Every removal triggers a claim review
- Evidence is attached to the work order
- Deadlines are visible on a shared list
- Credits are matched and posted to the unit
Deadlines and Status Tracking
Identified
Failure noted, tire preserved, owner assigned.
Packet ready
Evidence complete and checked against the warranty terms.
Submitted
Claim number and submission date recorded.
Under review
Follow-up dates set; vendor inspection scheduled.
Decided
Approved, adjusted, or denied, with the reason noted.
Credited
Credit memo matched and posted; claim closed.
Prevention Is Part of the Claim Defense
Maintenance records are your strongest evidence
- Routine pressure checks show the tire was not run underinflated.
- Scheduled alignment and rotation records answer irregular wear arguments.
- Tread depth logged at each service builds a wear curve the vendor can verify.
- Inspection photos taken before failure confirm condition history.
A claim is denied most often when
Records show no pressure checks
The tire cannot be identified
The filing deadline has passed
The tire was discarded first
Metrics Worth Tracking
Claim filing rate
Eligible failures that actually become claims.
Approval rate
Claims approved or adjusted versus denied, by brand and vendor.
Days to credit
Elapsed time from submission to credit memo.
Cost per mile by brand
Net of recovered credits, to guide purchasing.
Understanding the Warranty Types Behind a Tire
Manufacturer workmanship and materials
This covers defects introduced during manufacturing, such as separations or internal structural faults. Coverage periods and mileage or tread limits depend on the tire line, so store the exact document with the purchase record.
Treadwear or adjustment coverage
Some commercial tires carry a pro-rated adjustment based on remaining tread. The credit shrinks as tread wears, so accurate tread depth readings at removal directly affect the value of the claim.
Road hazard programs
Punctures, cuts, and impact damage are usually handled by a separate road hazard or service agreement from the dealer. Know which program applies before assuming a failure is a defect.
Retread and casing programs
Retreaded tires often have a separate process warranty from the retreader, and the original casing may carry its own history. Track casing identity so a retread failure reaches the right party.
Put Tire Evidence Where Claims Can Find It
Attach inspections, photos, and removal records to each tire so the next claim packet takes minutes, not days.
Handling Common Objections From Vendors
"The tire was run underinflated"
Answer with dated pressure readings from inspections and PMs for that position. A consistent record is the strongest rebuttal, and its absence is the most common reason a claim fails.
"This looks like impact damage"
Provide photos of the full tire, any incident notes from the driver, and the failure location. Sidewall and tread-area damage are judged differently, so close, labeled photos matter.
"The tire is outside the claim period"
Confirm the install date and the exact clause that sets the period. Check whether the date counts from purchase, manufacture, or installation, because the terms differ.
"Wear is caused by alignment or mismatch"
Show alignment checks, dual-tire matching records, and rotation history. If an alignment fault was found and fixed, say so honestly and claim only what the terms allow.
"We cannot identify the tire"
This is preventable. Record the serial and DOT code at install and again at removal, and keep the physical tire tagged until the claim closes.
"We need the tire inspected first"
Agree a pickup or inspection date, record who collected it, and keep the receipt. A tire that left your shop without a record can become a lost claim.
Photo and Inspection Standards for Claim Evidence
Make evidence consistent, not just available
- Photograph the full tire first, then the tread face, then each sidewall, then the failure close up with a reference object for scale.
- Capture the DOT code and serial in a clearly readable photo before any other image.
- Take photos before the tire is moved, cleaned, or cut, so the original condition is visible.
- Record tread depth at several points across the face, since uneven wear tells its own story.
- Add a short written note on conditions: load, route, recent events, and who reported the problem.
Photo checklist per claim
DOT code and serial
Full tire and tread face
Both sidewalls
Failure area close up
Tread depth gauge in use
Governance: Who Does What and When
Claim owner
One named person owns the claim register, deadlines, and vendor contact. Without a single owner, packets stall between the shop and the office.
Removal rule
Every tire removed before expected life triggers a short claim review, even if the answer is that no claim applies. The decision is recorded either way.
Storage rule
Tagged tires are held in a defined area until the claim closes, and only the claim owner authorizes disposal.
Vendor review
Review approval rates and response times by vendor every quarter, and use the results in pricing and supplier discussions.
Training
Teach drivers, inspectors, and technicians what evidence to capture and why. A short checklist at the point of failure prevents most gaps.
A 90-Day Rollout Plan
Week 1
Name the claim owner and list active tire brands and their warranty documents.
Weeks 2 to 3
Start recording serial and DOT codes at every install and removal.
Weeks 4 to 5
Add pressure and tread depth to inspections and PM templates.
Weeks 6 to 8
Introduce the claim packet checklist and the tagged-tire storage rule.
Weeks 9 to 10
Submit claims through the process and log every outcome and reason.
Weeks 11 to 13
Review results, fix gaps, and set quarterly vendor reviews.
Common Mistakes That Cost Fleets Their Claims
Scrapping first
The tire is thrown out during the repair, and the claim dies with it.
Tracking by unit only
Without a tire identity, you cannot prove age, brand, or position.
Missing the window
No shared calendar means deadlines pass unnoticed.
Filing without checking terms
Claims for excluded damage waste time and weaken your credibility.
Adapting the Process to Fleet Size
Smaller fleets
- Let the shop lead or office manager own the claim register
- Rely on the tire dealer for inspection and paperwork, but keep your own copy of every record
- Use a simple status list and a weekly review of open claims
- Concentrate on serial capture and pressure checks first, since they give the most protection for the least effort
Larger and multi-site fleets
- Assign a central claim coordinator so vendors have one contact
- Standardize photo and packet requirements across all locations
- Compare approval rates and cost per mile across brands and sites
- Feed claim outcomes into tire purchasing decisions and contract renewals
Whatever the size, the principle is the same: a claim is only as strong as the records created before the tire failed. Evidence gathered afterward is always weaker than evidence captured during routine inspections.
Using Claim Data to Improve Tire Purchasing
Compare brands on net cost
Cost per mile after recovered credits is a fairer comparison than purchase price alone.
Spot problem sizes or lots
Repeated failures in one size or production period can justify a supplier conversation.
Match tire to position
Failure patterns by axle and application show where a different specification is needed.
Support contract terms
Documented claim history gives you leverage when negotiating warranty and service terms.
How Oxmaint Supports the Workflow
Asset records
Hold each tire or tire position against the vehicle, with install and removal history.
Inspections
Log pressure and tread depth through mobile checklists so condition history exists before a failure.
Work orders
Attach photos, DOT codes, and notes to the removal job and trigger a claim review task.
Inventory
Track tire stock, purchase details, and vendor information for warranty lookups.
Reporting
Compare cost per mile and failure patterns by brand, size, and position.
Frequently Asked Questions
What should a fleet record when a tire fails early?
Record the serial and DOT code, unit and position, mileage, tread depths, photos, and the reason for removal. Keep the tire until the claim closes.
Does every early failure qualify for a claim?
No. Damage, underinflation, and road hazards are often treated differently from defects. Check the actual warranty and road hazard terms before filing.
Who should own the claim process?
Assign one coordinator, usually in parts or tire management, while technicians and inspectors supply evidence. Shared ownership usually means missed deadlines.
How do maintenance records help a denied claim?
Pressure checks, alignment, and tread history show the tire was maintained. You can keep those records in one place for each tire.
Can this work for a small fleet?
Yes. Start with serial capture and a deadline list, then expand. Book a demo to see a lightweight setup.
Recover What Your Tires Already Earned
Track every tire failure from inspection to credit memo, with the evidence and deadlines attached to the unit.