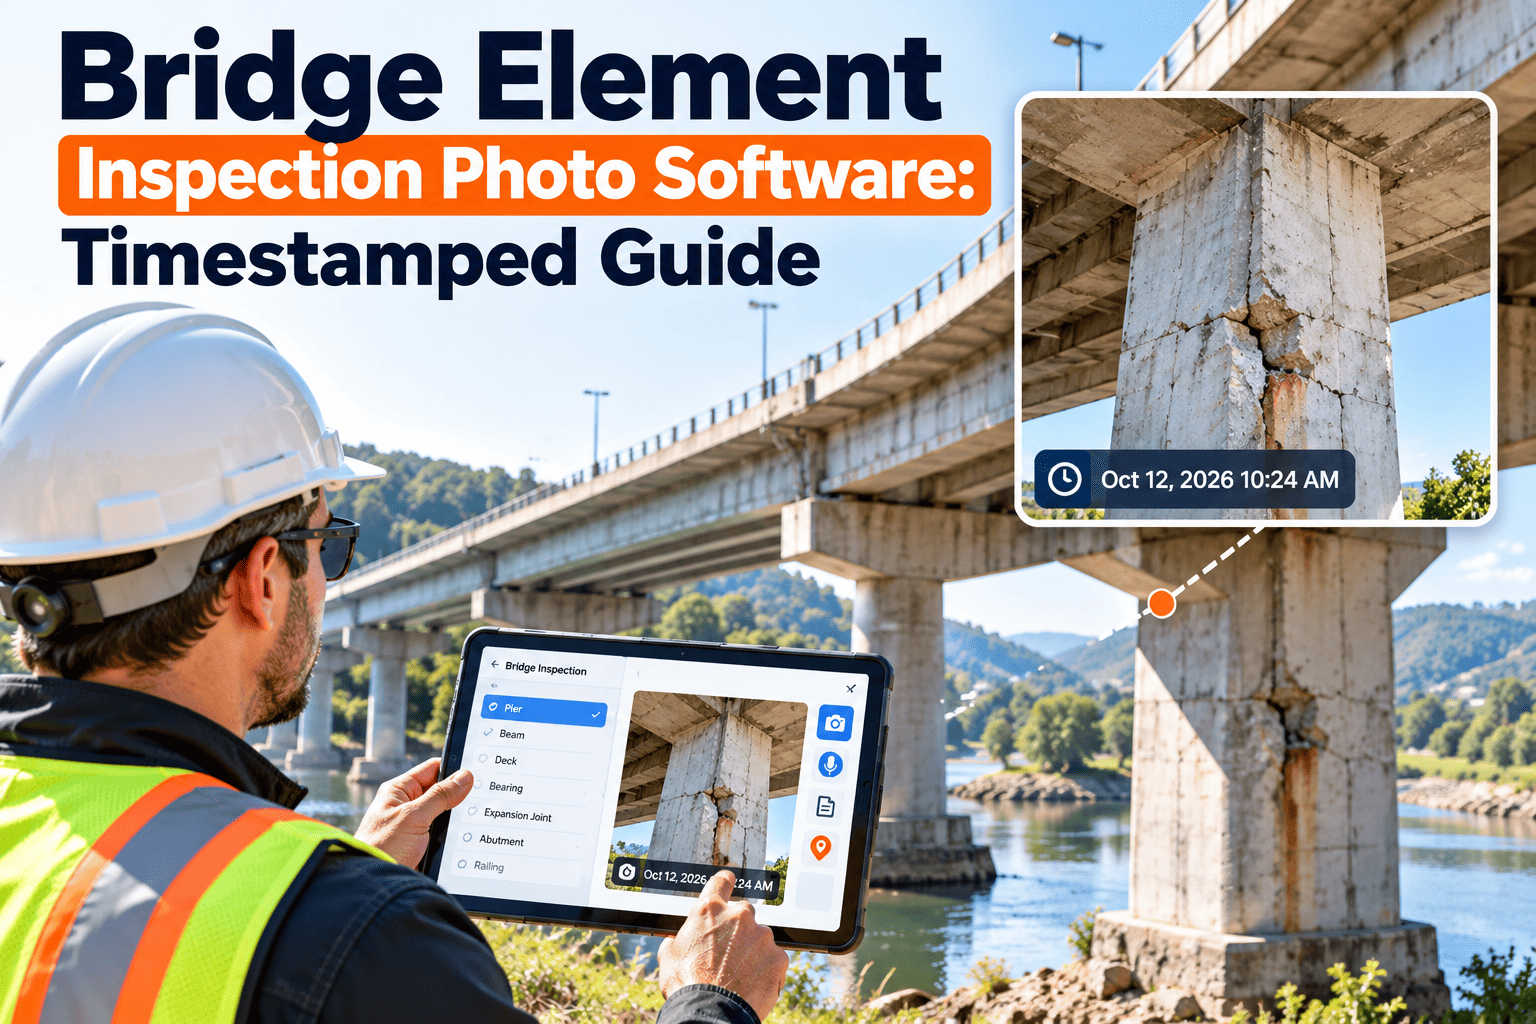
Bridge inspection photos lose most of their value when nobody can tell which element they show, when they were taken, or how they compare with the last inspection. Folders of unlabeled images turn peer reviews and DOT audits into guessing games. Capturing every photo inside the inspection record, tied to the element and stamped with date and location data, fixes that problem at the source. This guide explains the practice and how Oxmaint maintenance management software supports it.
Bridge Element Inspection Photo Software: Timestamped Guide
Element-level inspection under NBIS depends on evidence that reviewers can trust. See how to capture timestamped, location-aware photos per element, and keep them linked to condition ratings and repairs.
Why photo evidence matters in element-level inspection
Under the National Bridge Inspection Standards in 23 CFR 650 Subpart C, owners must inspect, rate, and document bridge condition on a defined cycle. Photos are the proof behind the ratings.
- They show the inspector's finding without requiring a second site visit.
- They let the next inspector compare condition across cycles.
- They support load rating, repair scoping, and funding requests.
- They help answer questions from peer reviewers and state DOT audits.
The AASHTO Manual for Bridge Element Inspection defines elements and condition states, and photos are what make a condition state defensible.
What goes wrong with photos today
Photos live on personal devices
Images stay on a phone or camera card until someone remembers to upload them, and some never arrive.
File names carry the only context
A name like IMG_4471 says nothing about the bridge, element, or defect shown.
Dates are unreliable
Camera clocks drift and file copies reset modified dates, which makes sequence uncertain.
No same-angle comparison
Photos from different angles and distances cannot show whether a crack grew.
Photos are detached from actions
A defect photo exists, but no work order or repair record points to it.
The five photo types every element record needs
Consistent photo types make records scannable. Capture these as a minimum for elements with notable findings.
Overall
Shows the bridge or span from a standard viewpoint so reviewers can orient themselves.
Element
Shows the whole element, such as a girder line, bearing, or pier, in context.
Defect
Shows the specific crack, spall, corrosion, or section loss with a scale reference.
Close-up
Shows detail needed for rating, such as exposed reinforcement or crack width.
Comparison
Repeats a prior photo from the same position so change is visible.
Metadata that makes a photo defensible
A photo without metadata is an opinion. These fields turn it into a record.
| Field | Purpose | How it should be captured |
|---|---|---|
| Bridge identifier | Ties the photo to the right structure | Inherited from the inspection record, not typed |
| Element and location | Identifies span, line, and element | Selected from the asset hierarchy |
| Date and time | Proves when the condition was observed | Recorded automatically at capture |
| Geographic coordinates | Confirms the photo was taken at the site | Recorded from the device when location services are on |
| Inspector | Shows accountability | Taken from the signed-in user |
| Caption or note | Explains what the reviewer should see | Short text added in the field |
| Condition state | Links the image to the rating | Chosen on the same inspection form |
Stop searching folders for bridge photos
Put photos, element ratings, and work orders into the same inspection record.
The photo life of an element across inspection cycles
A well-run record accumulates evidence over time. Each cycle adds to a visible history.
Same defect, two records
This comparison shows the difference between a loose photo folder and a linked element record.
Loose folder
- Files named by camera number
- Date taken from file properties
- No link to condition state
- Repair decision in a separate email
- Next inspector starts from scratch
Linked element record
- Photos named and filed by element automatically
- Date, time, and location recorded at capture
- Condition state beside the photo
- Work order attached to the same finding
- Next inspector sees prior photos in the field
Condition states and the photos that support them
Element condition states generally run from 1, good, through 4, severe. The photo requirements differ at each level.
Photo capture workflow in the field
- Open the inspection. Select the bridge and the inspection type from the schedule on the mobile device.
- Select the element. Pick it from the hierarchy so the photo inherits its identity.
- Record the condition. Enter the condition state and quantity before or while photographing.
- Take the photos. Capture overall, defect, and close-up views using a consistent order.
- Add a short caption. Note what the reviewer should look at, using plain language.
- Flag follow-up. Create a corrective work order or notify an engineer for serious findings.
- Sync and review. Upload when connected and confirm that photos appear on the element.
Photo practices by element type
| Element | Typical defects to photograph | Practical tip |
|---|---|---|
| Deck and slab | Cracking, spalling, delamination indicators, wearing surface wear | Mark the area and photograph from the same station each cycle |
| Girders and beams | Corrosion, section loss, fatigue cracks, impact damage | Include a scale and a view that identifies the girder line |
| Bearings | Corrosion, misalignment, bulging, debris | Photograph from the same angle each cycle to show movement |
| Abutments and piers | Cracks, spalls, settlement, scour exposure | Include water level and channel context |
| Expansion joints | Leakage, seal damage, debris, deck edge damage | Capture the underside where staining shows leakage paths |
| Railings and barriers | Impact damage, missing hardware, deterioration | Photograph the full run and any damaged connections |
Preparing for NBIS peer reviews and DOT audits
Reviewers look for consistency between ratings, notes, and photographs. Expect them to ask these questions.
- Does each reported condition state have supporting photos or notes?
- Can the owner show when each photo was taken and by whom?
- Were comparable photos taken in prior cycles?
- Were serious findings escalated, and is there evidence of the response?
- Can the inspection team retrieve photos quickly without searching folders?
Requirements and data formats, including the move toward the Specifications for the National Bridge Inventory, vary by state, so confirm details with your DOT.
How Oxmaint supports bridge photo records
Oxmaint is a maintenance management platform. It helps keep photos inside the workflow rather than beside it.
Asset management
Bridges, spans, and elements as a hierarchy that photos attach to.
Mobile inspections
Checklists and photo capture on a phone or tablet at the structure.
Work orders
Findings convert to corrective work with the photos still attached.
Scheduling
Recurring inspections and follow-up visits generated by cycle.
Reports
Dashboards for overdue inspections, open findings, and completion.
Records
A searchable history by bridge, element, and date.
Photo quality standards inspectors can follow
Consistent technique matters as much as the metadata. Agree on a short standard and train every inspector on it.
- Hold the camera square to the surface so crack lengths and spall edges are not distorted.
- Include a ruler, crack gauge, or known object for scale in every defect photo.
- Use supplemental lighting under decks and inside box girders, where shadows hide detail.
- Clean loose debris only where the procedure allows, and photograph before and after.
- Take one wider shot after each close-up so the defect can be located later.
- Avoid digital zoom, which reduces detail that engineers may need.
Special inspections and hard-to-reach elements
Some elements need extra planning because access is limited or the consequences of a missed defect are higher.
| Situation | Photo consideration |
|---|---|
| Fracture critical members | Document connection details and any crack indications from several angles, with notes for the engineer. |
| Underwater inspections | Record dive team photos with element and location references, and keep them in the same bridge record. |
| Scour and channel conditions | Photograph foundation exposure with channel context, and repeat from fixed positions. |
| Post-event inspections | Take photos soon after floods, impacts, or other events and tag them as event-driven. |
| Culverts and confined spaces | Capture overall and defect photos at fixed stations along the structure. |
Naming and filing: what a clean photo record looks like
If photos are attached inside the inspection, naming is handled by the record. If you must export, a consistent convention still helps.
Operational impact of weak photo records
- Engineers return to the site because the photos did not answer their questions.
- Repair scopes grow because quantities cannot be verified from images.
- Peer reviews take longer because evidence must be assembled by hand.
- Deterioration rates are hard to estimate without same-angle history.
- Staff turnover erases the informal knowledge of where to look.
Good photo records reduce rework. They also give maintenance planners a clearer basis for deciding what to repair first.
Who uses bridge photos after the inspection
A photo is captured once but used by several people. Designing for each audience improves what inspectors capture.
Program managers
Check that inspections are complete, ratings are supported, and overdue bridges are visible before an audit.
Bridge engineers
Review defects remotely, request follow-up evaluations, and compare conditions across cycles.
Maintenance crews
Use photos to locate defects, plan access, and bring the right materials for repairs.
Load rating staff
Rely on documented section loss and damage when updating capacity assessments.
Auditors and reviewers
Sample records to confirm ratings match the visual evidence and the dates.
Future inspectors
Use earlier photos to find reference points and recognize change quickly.
Rolling out photo-linked inspections in four stages
Start with a small group of bridges and a short list of elements, then expand once inspectors are comfortable.
Mistakes that weaken bridge photo records
Process mistakes
- Uploading photos weeks after the inspection
- Letting each inspector choose a different naming style
- Photographing only the worst defects, with no context shots
- Skipping comparison photos because they take extra time
Better habits
- Capture inside the inspection form so identity is automatic
- Use one capture standard across the team
- Take wide, element, and close-up views in a fixed order
- Show the previous photo on the device and match it
KPIs for a healthy bridge photo program
Photo coverage
Share of elements rated condition state 2 or worse with a defect photo.
Sync timeliness
Days between inspection and photos appearing in the record.
Comparison rate
Findings with a same-angle photo from the prior cycle.
Linked actions
Serious findings with a work order or engineer notice attached.
Overdue inspections
Bridges past their scheduled inspection date.
Retrieval time
Time to pull a photo history for a bridge during a review.
Photo documentation checklist
- Standard overall photos taken from the same viewpoints each cycle
- Every element rated condition state 2 or worse has a defect photo
- Scale reference included for cracks and section loss
- Date, time, and location captured automatically
- Captions written for serious findings
- Comparison photos taken where a prior photo exists
- Photos synced before leaving the site area
- Serious findings linked to a work order or engineer notice
Frequently asked questions
Are photos required for every element?
Requirements depend on your state DOT. Photos are generally expected where they support ratings and findings.
Can inspectors use their own phones?
That depends on your agency policy. Book a demo to review mobile workflows.
What if there is no signal at the bridge?
Mobile workflows commonly allow capture on site and sync later, so check your setup before the inspection.
How do we manage past photo archives?
Attach key historical photos to the right element, starting with high-priority bridges. You can sign up to test one structure.
Does this replace the inspection report?
No. It supplies organized evidence that supports the report and the ratings.
Give every bridge element a photo history reviewers can trust
Capture photos once, tie them to the element, and keep them ready for the next inspection, peer review, or audit.